Whether you sign up directly from the website or if you are simply reconnecting or adding additional stores to your Sublytics account, this guide will help you locate the API key needed to establish the connection. Below will cover how to connect Shopify or CrateJoy as a stand-alone platform, as well as cover the integration of a recurring billing app such as ReCharge or Bold in conjunction with Shopify. If you use ReCharge/Bold and do not add it, you will have data discrepancy issues.
Step 1: Generate an API Key in Shopify.
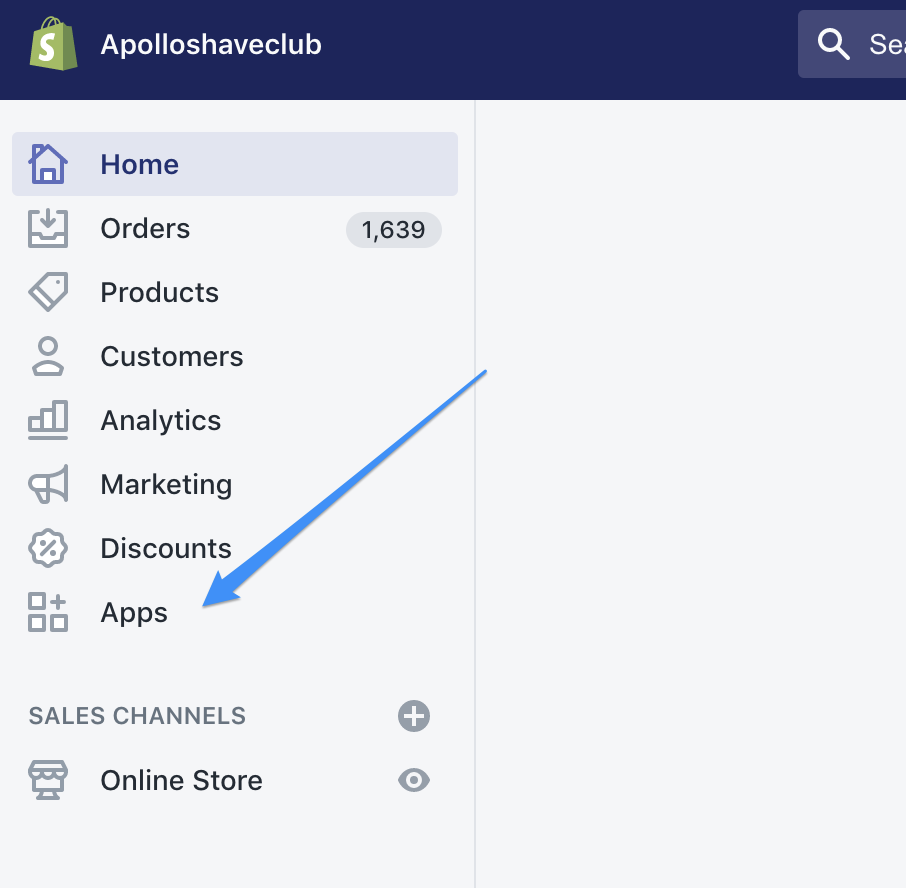
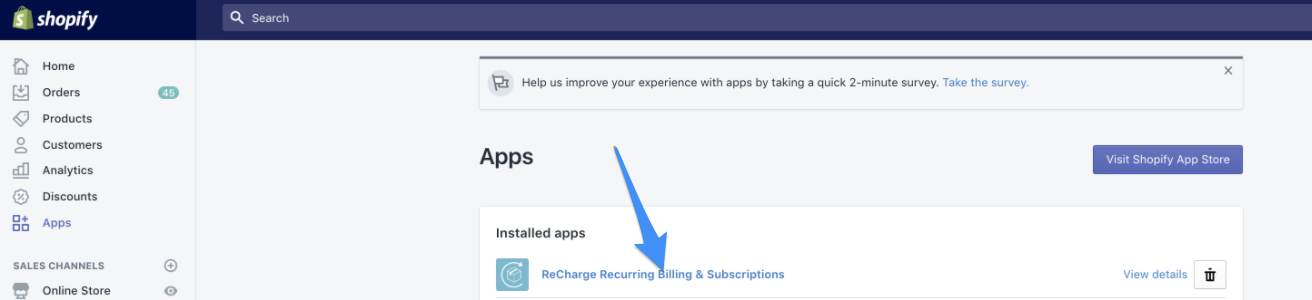
To generate an API Key in Shopify, navigate to the Apps section of the menu:
Once the App section opens, at the bottom of the page click the "Develop apps for your store" button:

It will load the Private Apps page. Click "Create an app" :

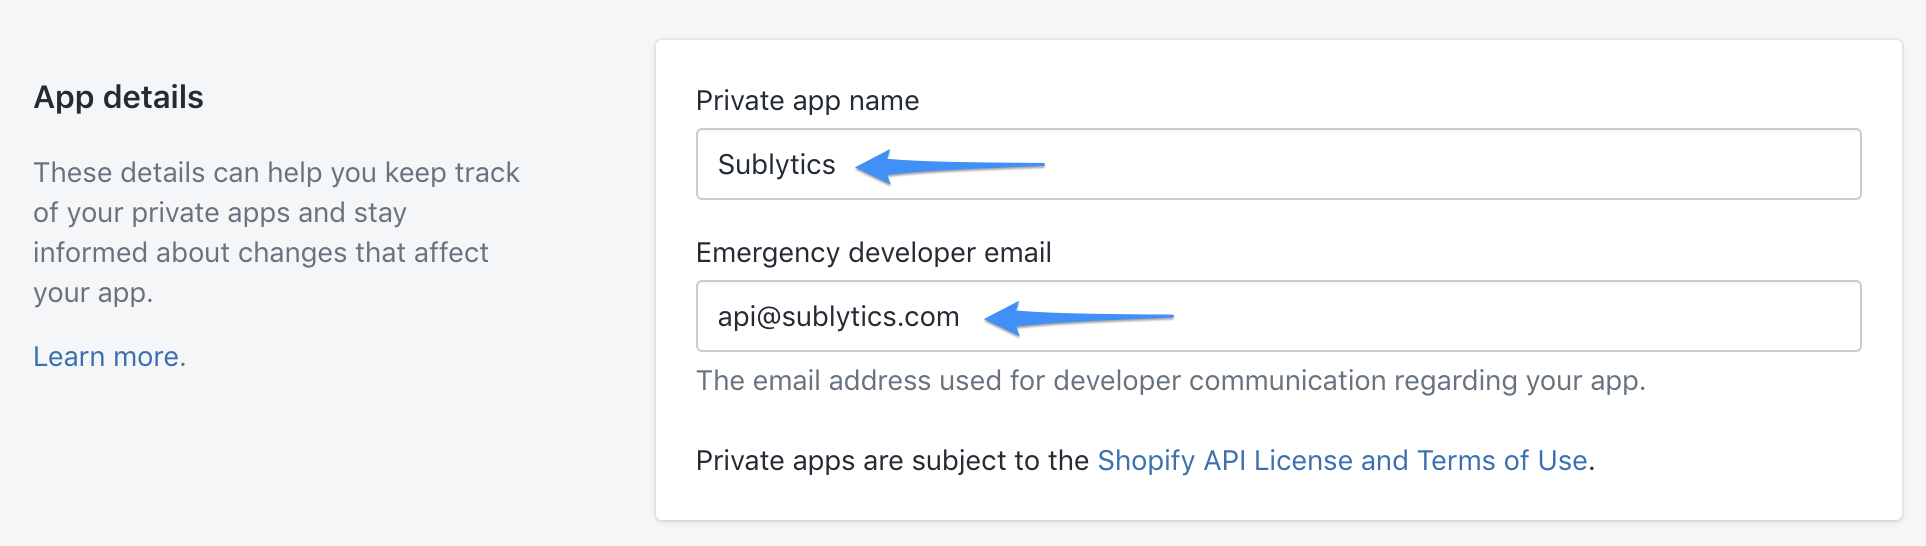
Use the following Name and Emergency developer email:
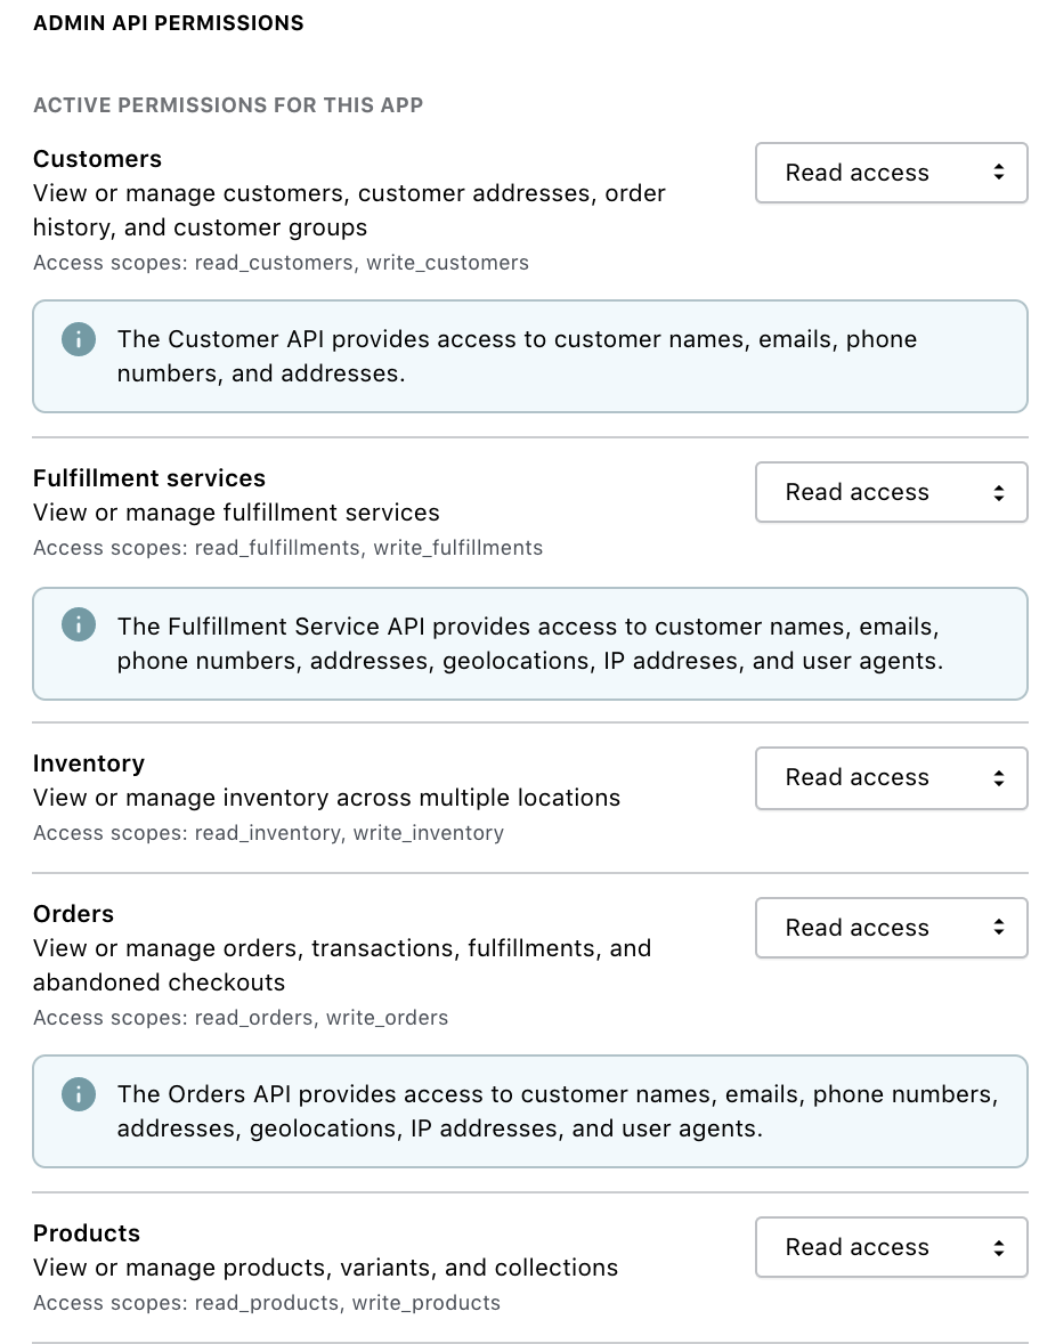
Set the Admin API Permissions for the following items to Read Only (you will need to drop down the arrow to Show Inactive Admin API Permissions to see the full permission set)
-
- Customers
- Fulfillment Services
- Inventory
- Orders
- Products
Make sure to click Save at the top!
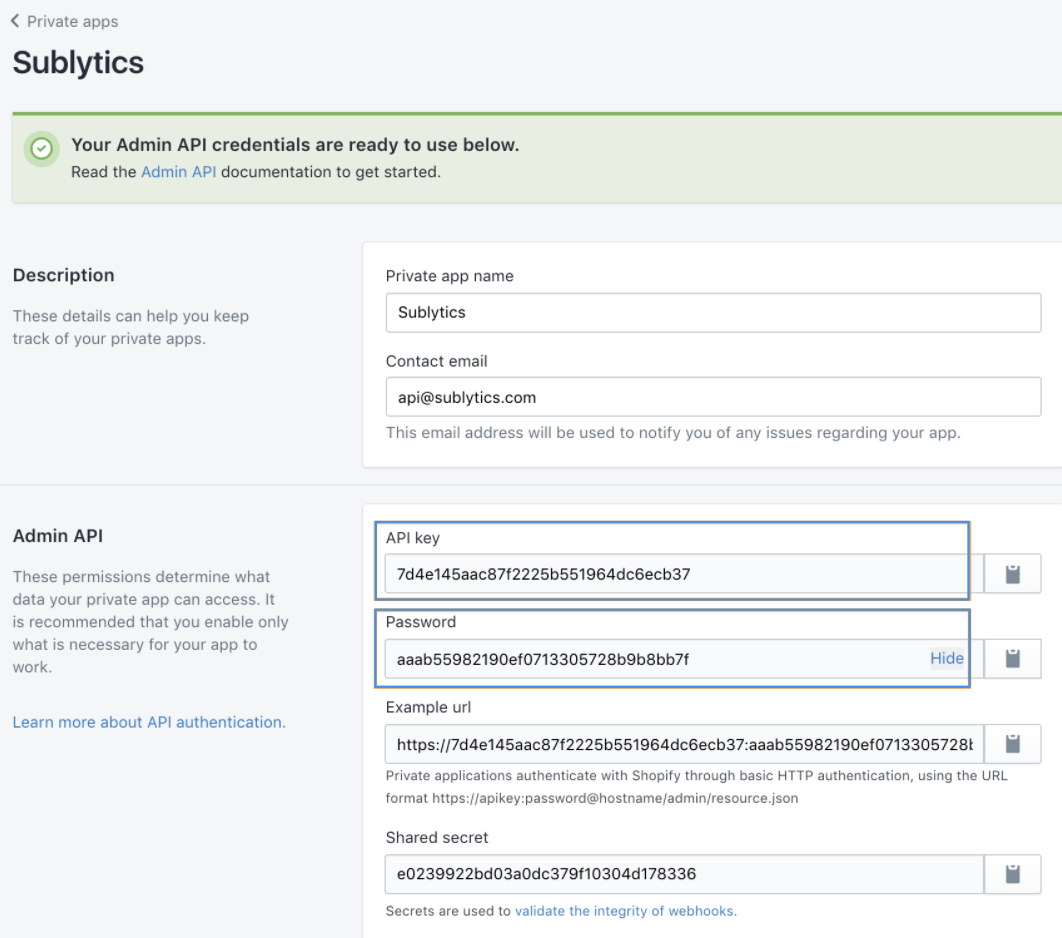
Shopify will then issue your API Keys:
Step 2: Generate an API Key in ReCharge. (If you do not use Recharge, please skip to Step 3)
To generate an API Key in Recharge, navigate to the Apps section of the menu:
Click on the ReCharge Billing App:
Click on Integrations and then API Tokens:
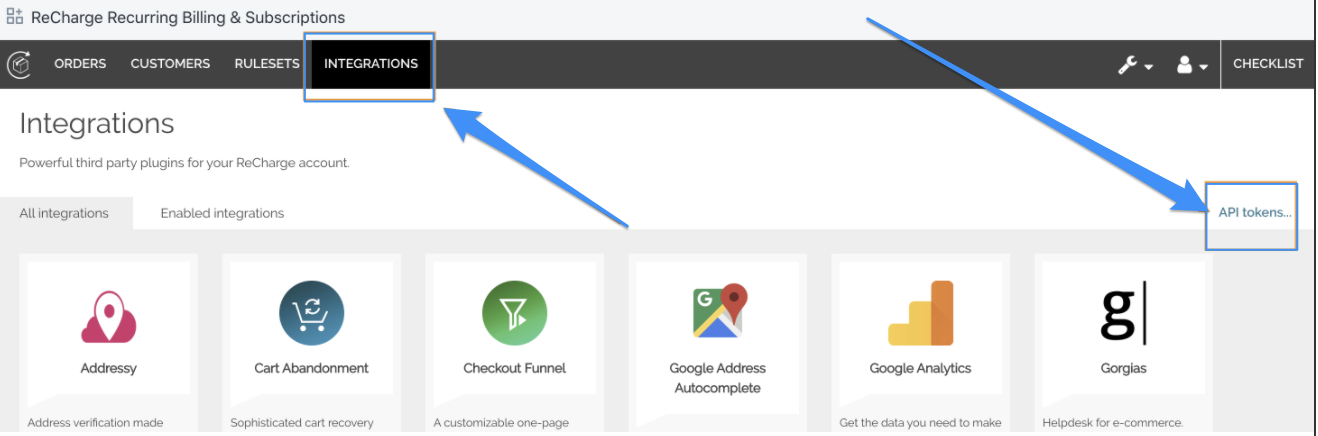
On the API tokens page, click "Create API Token."
The ReCharge API is only available for Shopify merchants who installed ReCharge before November 2nd, 2020, and are using the ReCharge Checkout. If you do not see the API tokens... link, you will have to request access to this from Shopify here.
Input the following information and API permissions:
-
- Orders
- Subscriptions
- Customers
- Products
- Store Information
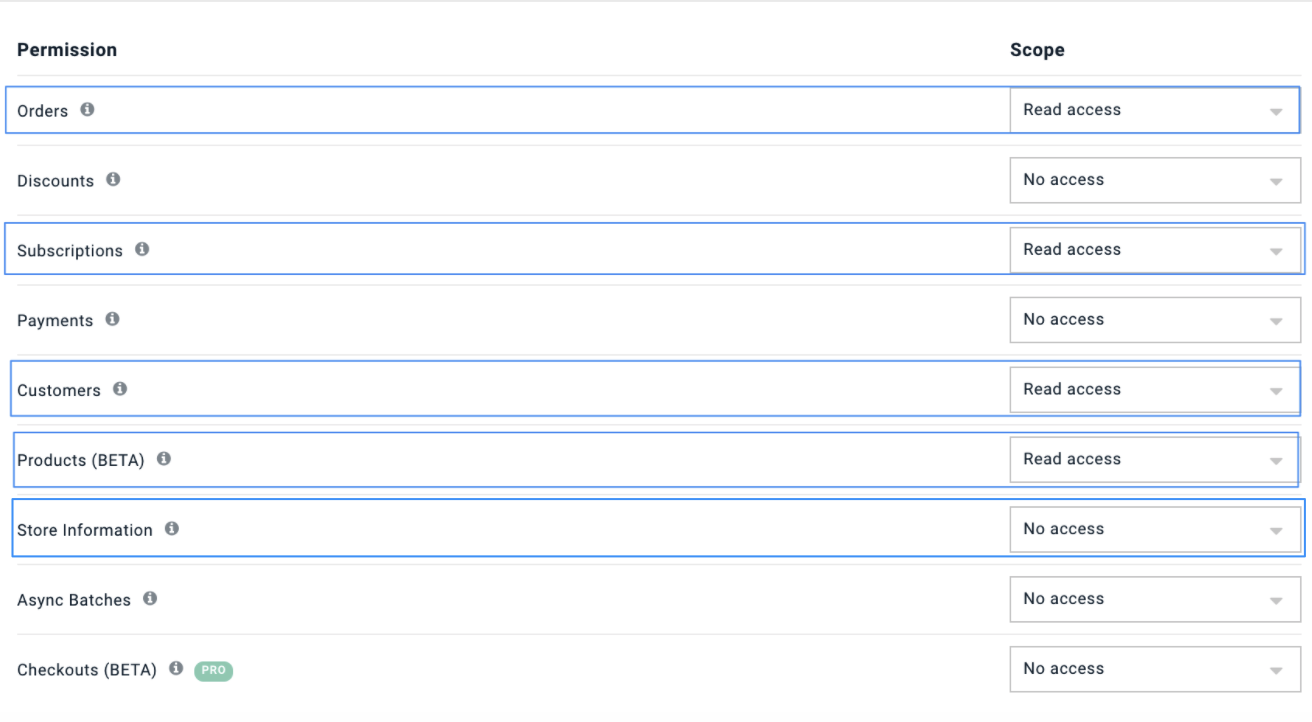
Click Save and it will generate the API Key:

Step 3: Add API key(s) to Sublytics
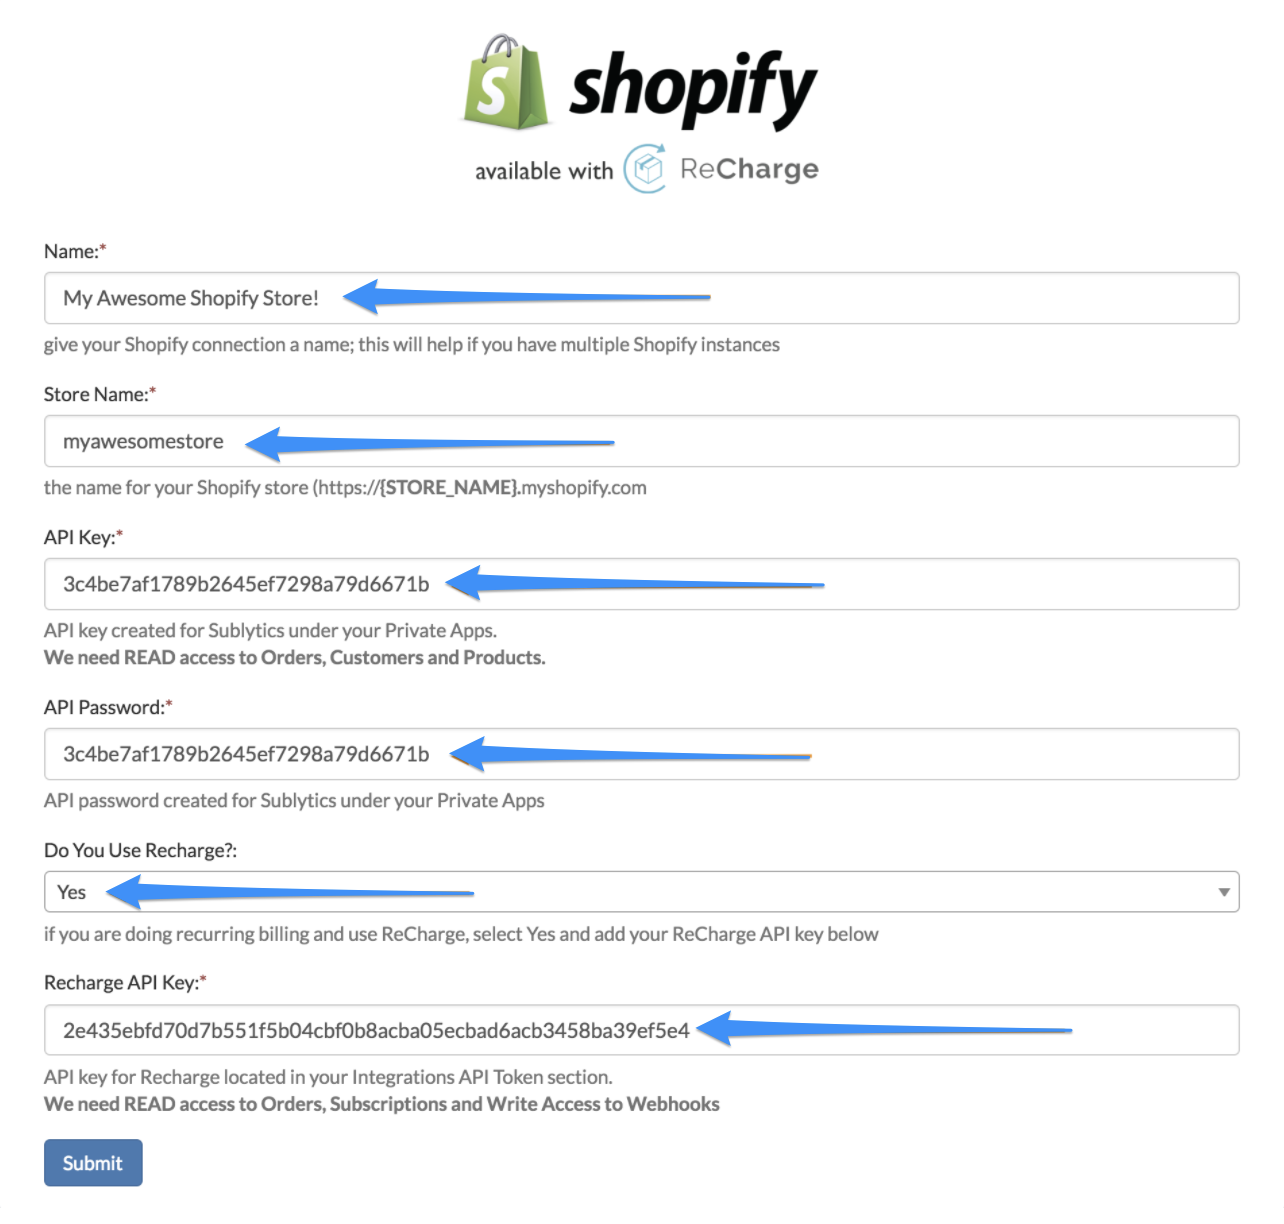
If you're signing up online, the below configuration panel will be available. If you are already signed up and connecting after the fact, you will need to navigate to the "Connections" tab of the menu and add a new connection. Our help desk article on adding new connections is located here.
Name the store to whatever you'd like, put the actual store domain, API key and Password. If you do use ReCharge and generated both the Shopify and ReCharge API keys, make sure to select "Yes" to reveal a section to add the ReCharge key input field.
Note: Shopify also has more information about their API authentication in their Shopify API help link.
Step 1: Generate an API Key in Cratejoy.
Cratejoy has a great support document that will walk you through finding and generating your API key here.
Step 2: Add API to Sublytics
Under your user profile, choose "Connections."
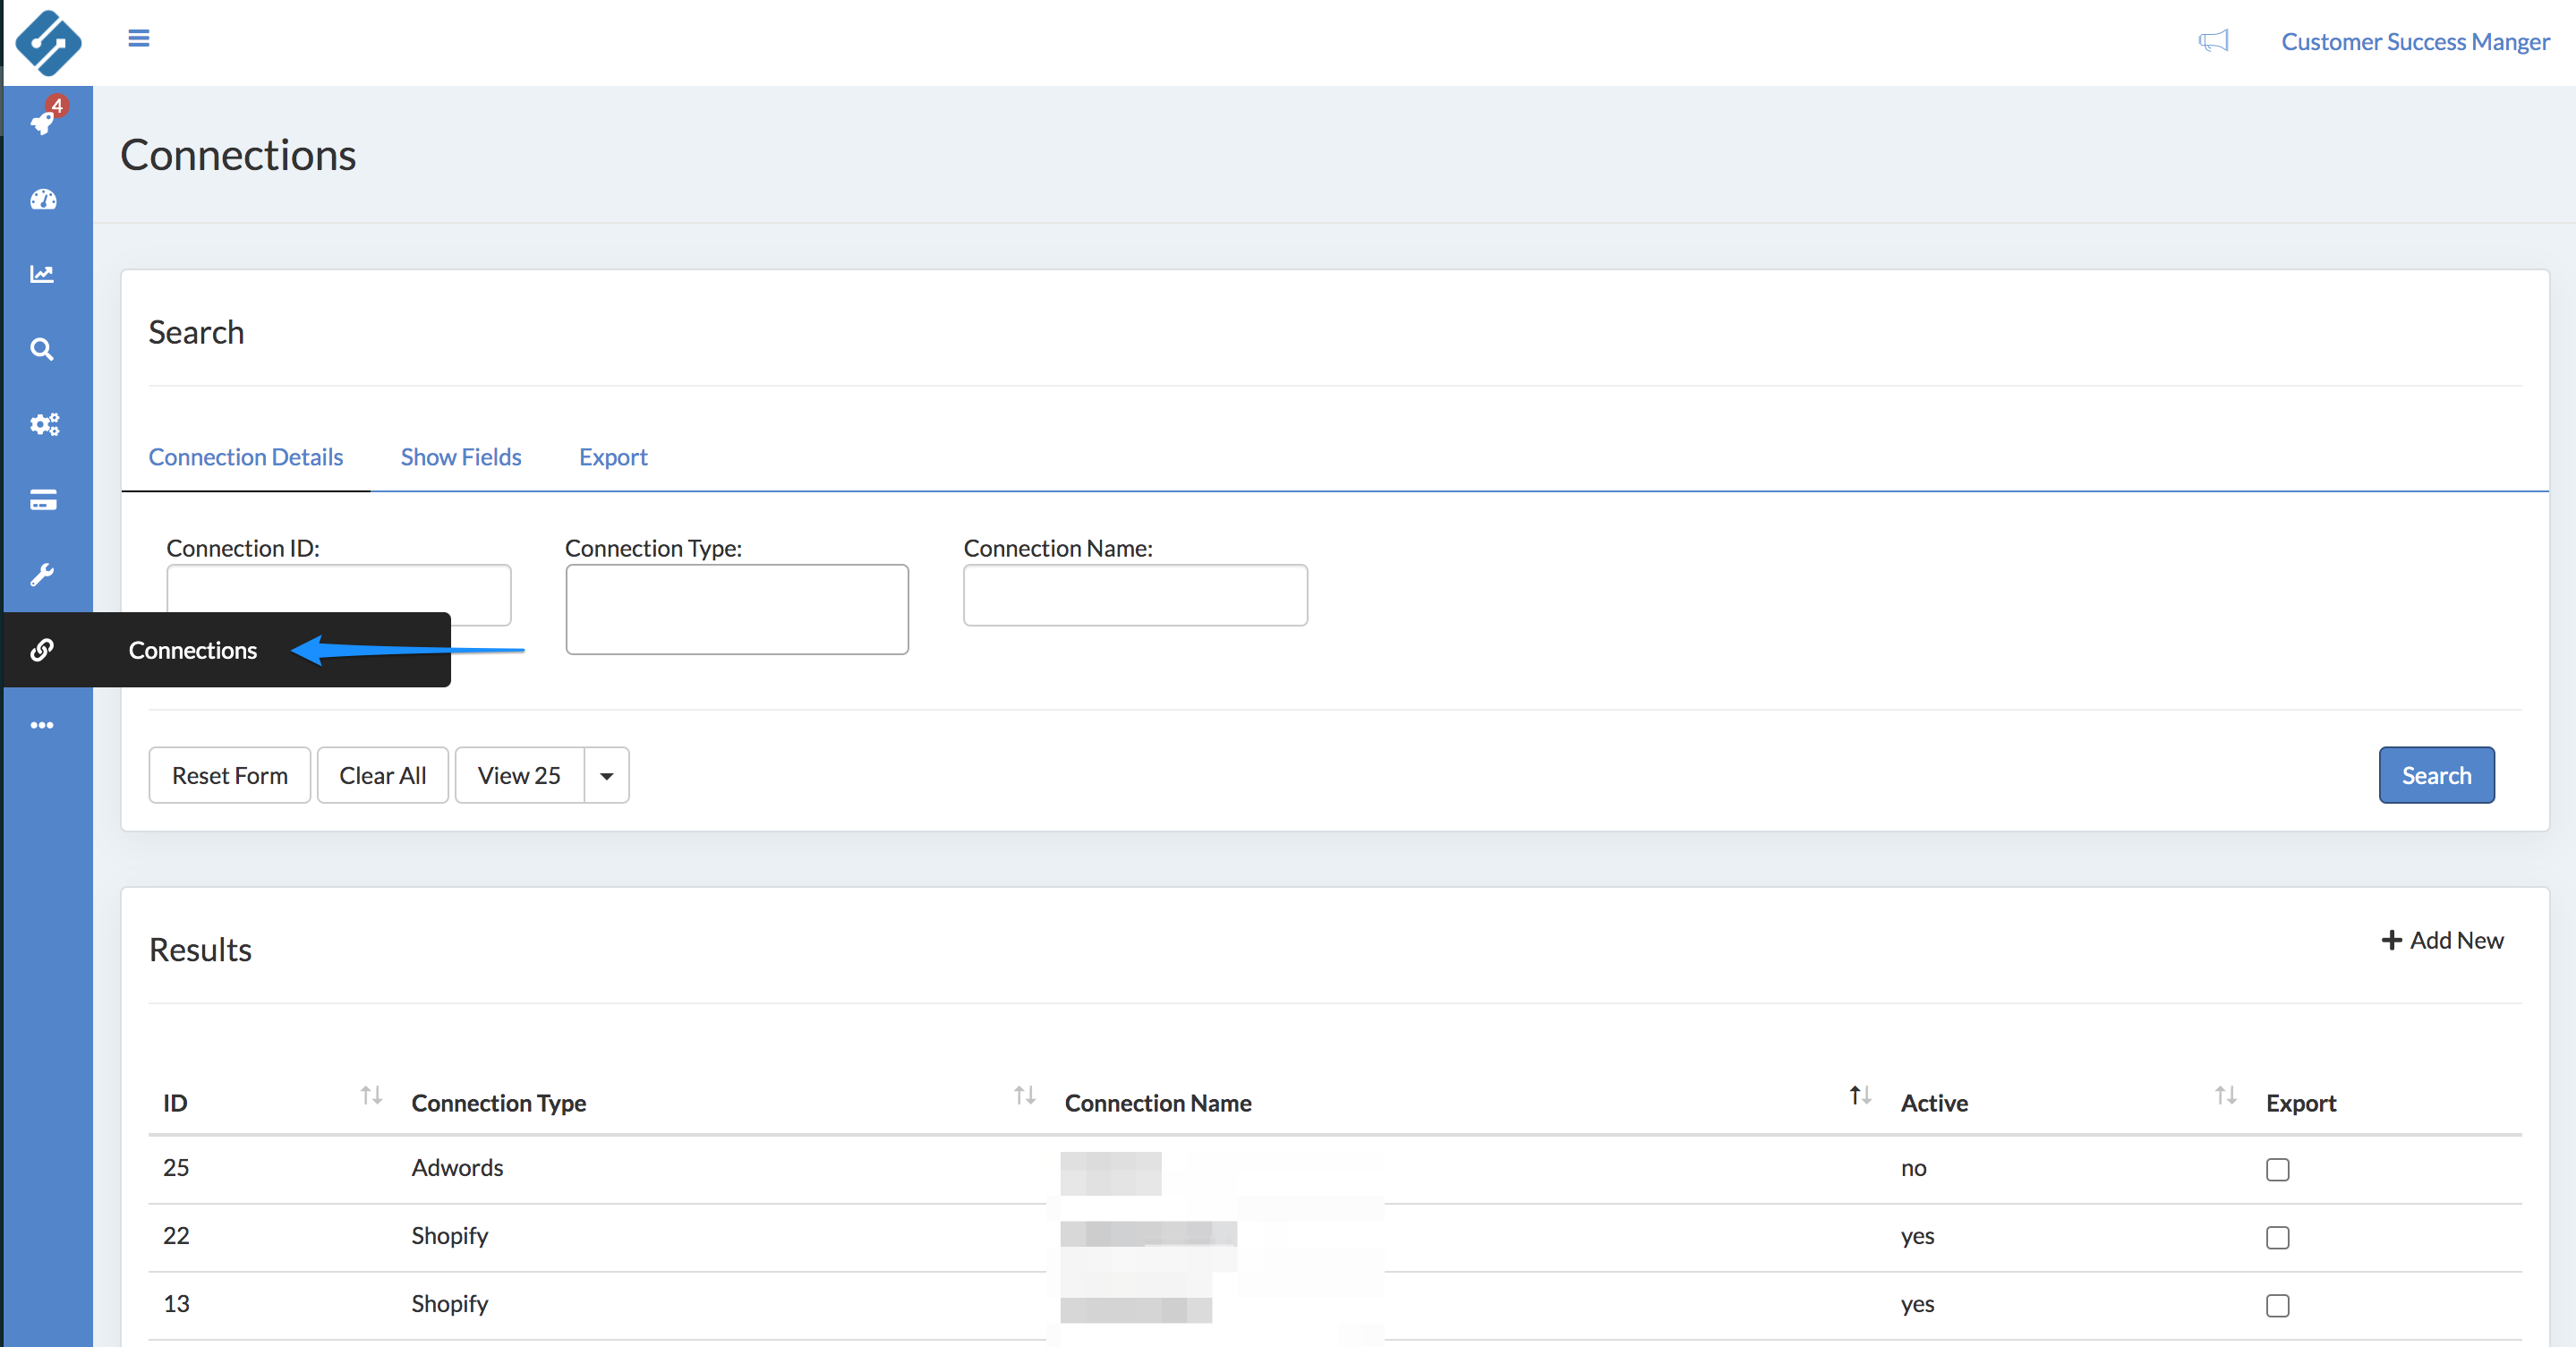
After choosing Connections, click "add new" located at the top right of the table.
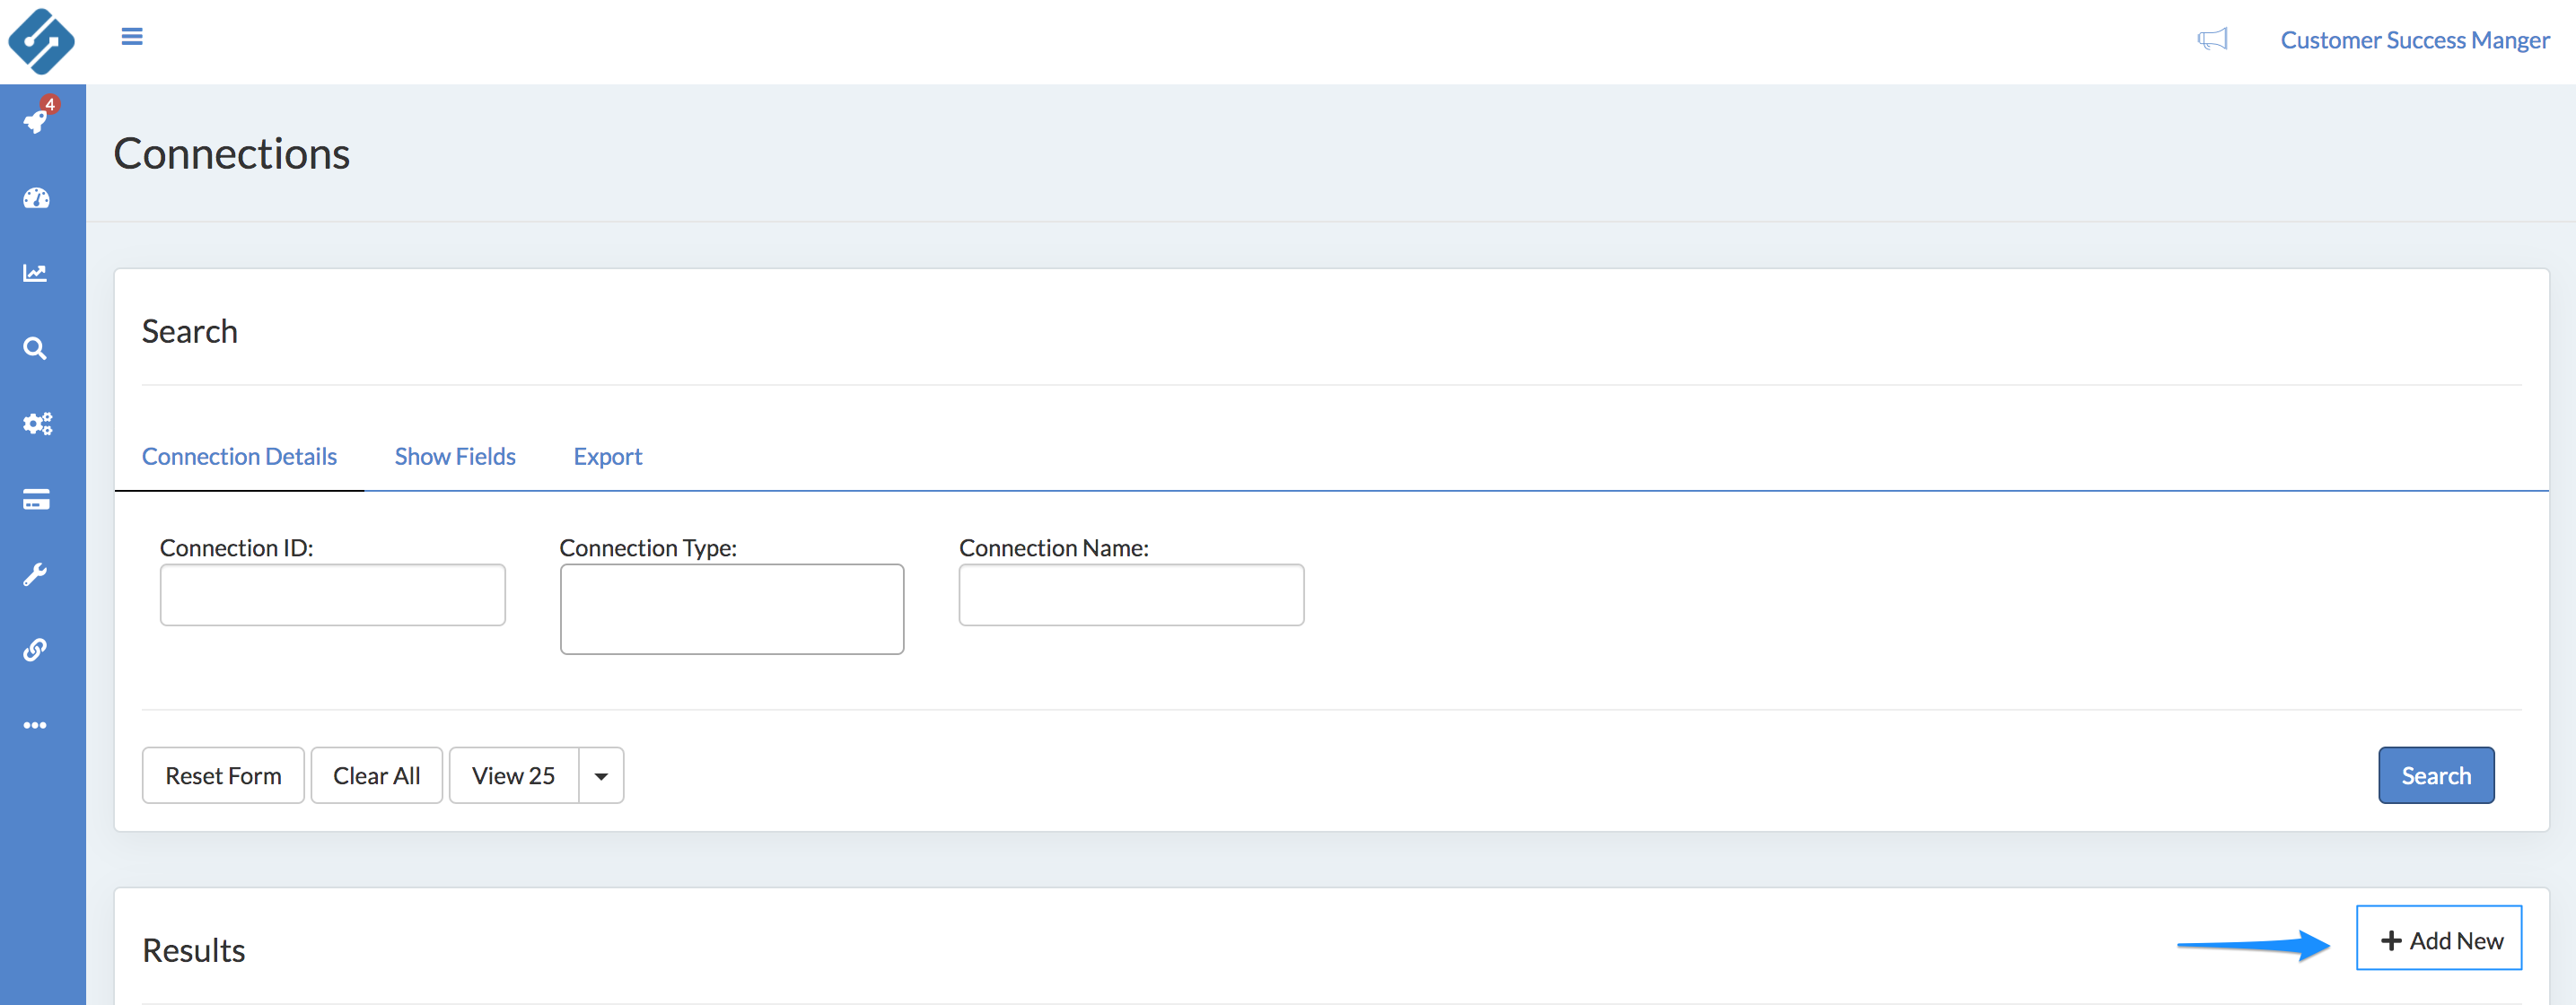
After clicking "add new", you will see a list of Connections available.
Click "Connect Now" and follow the instructions.

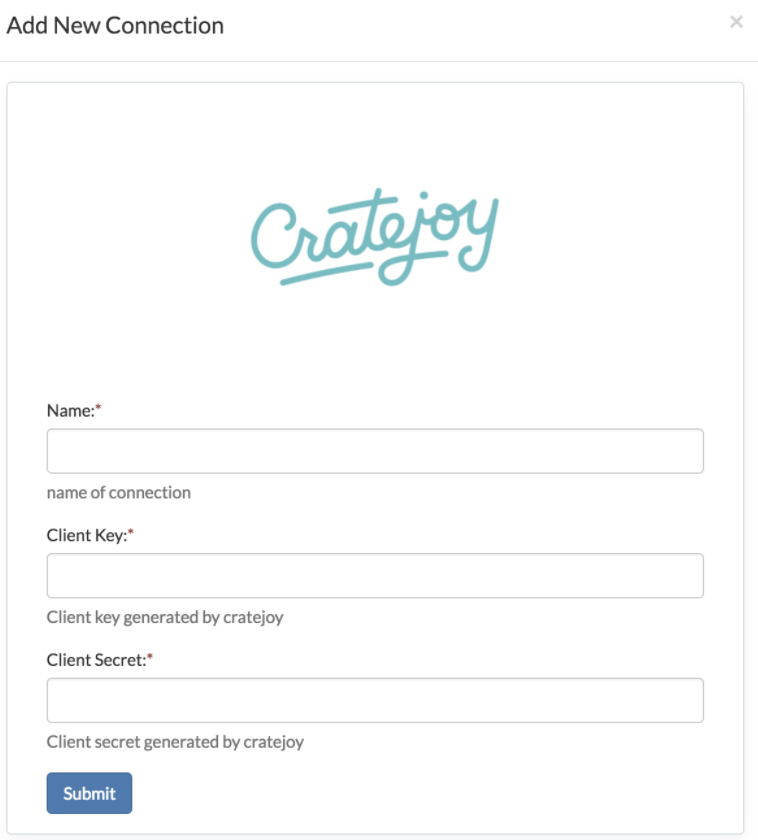
If you're signing up online, this form will be available. Name the store to whatever you'd like, put the actual store domain, API key and Password. You can find where to access your Cratejoy API key here.
Note: This is the name that you want to associate with this connection. If you have multiple connections from the same source (for example 2 x Cratejoy), make sure to name them unique.
To generate an API Key in Shopify, navigate to the Apps section of the menu:
Once the App section opens, at the bottom of the page click the "Manage Private Apps" button:

It will load the Private Apps page. Click "Create a New Private App" :

Use the following Name and Emergency developer email:
Set the Admin API Permissions for the following items to Read Only (you will need to drop down the arrow to Show Inactive Admin API Permissions to see the full permission set)
-
- Customers
- Fulfillment Services
- Inventory
- Orders
- Products

Make sure to click Save at the top!
Shopify will then issue your API Keys:
Step 2: Generate an API Key in Bold.
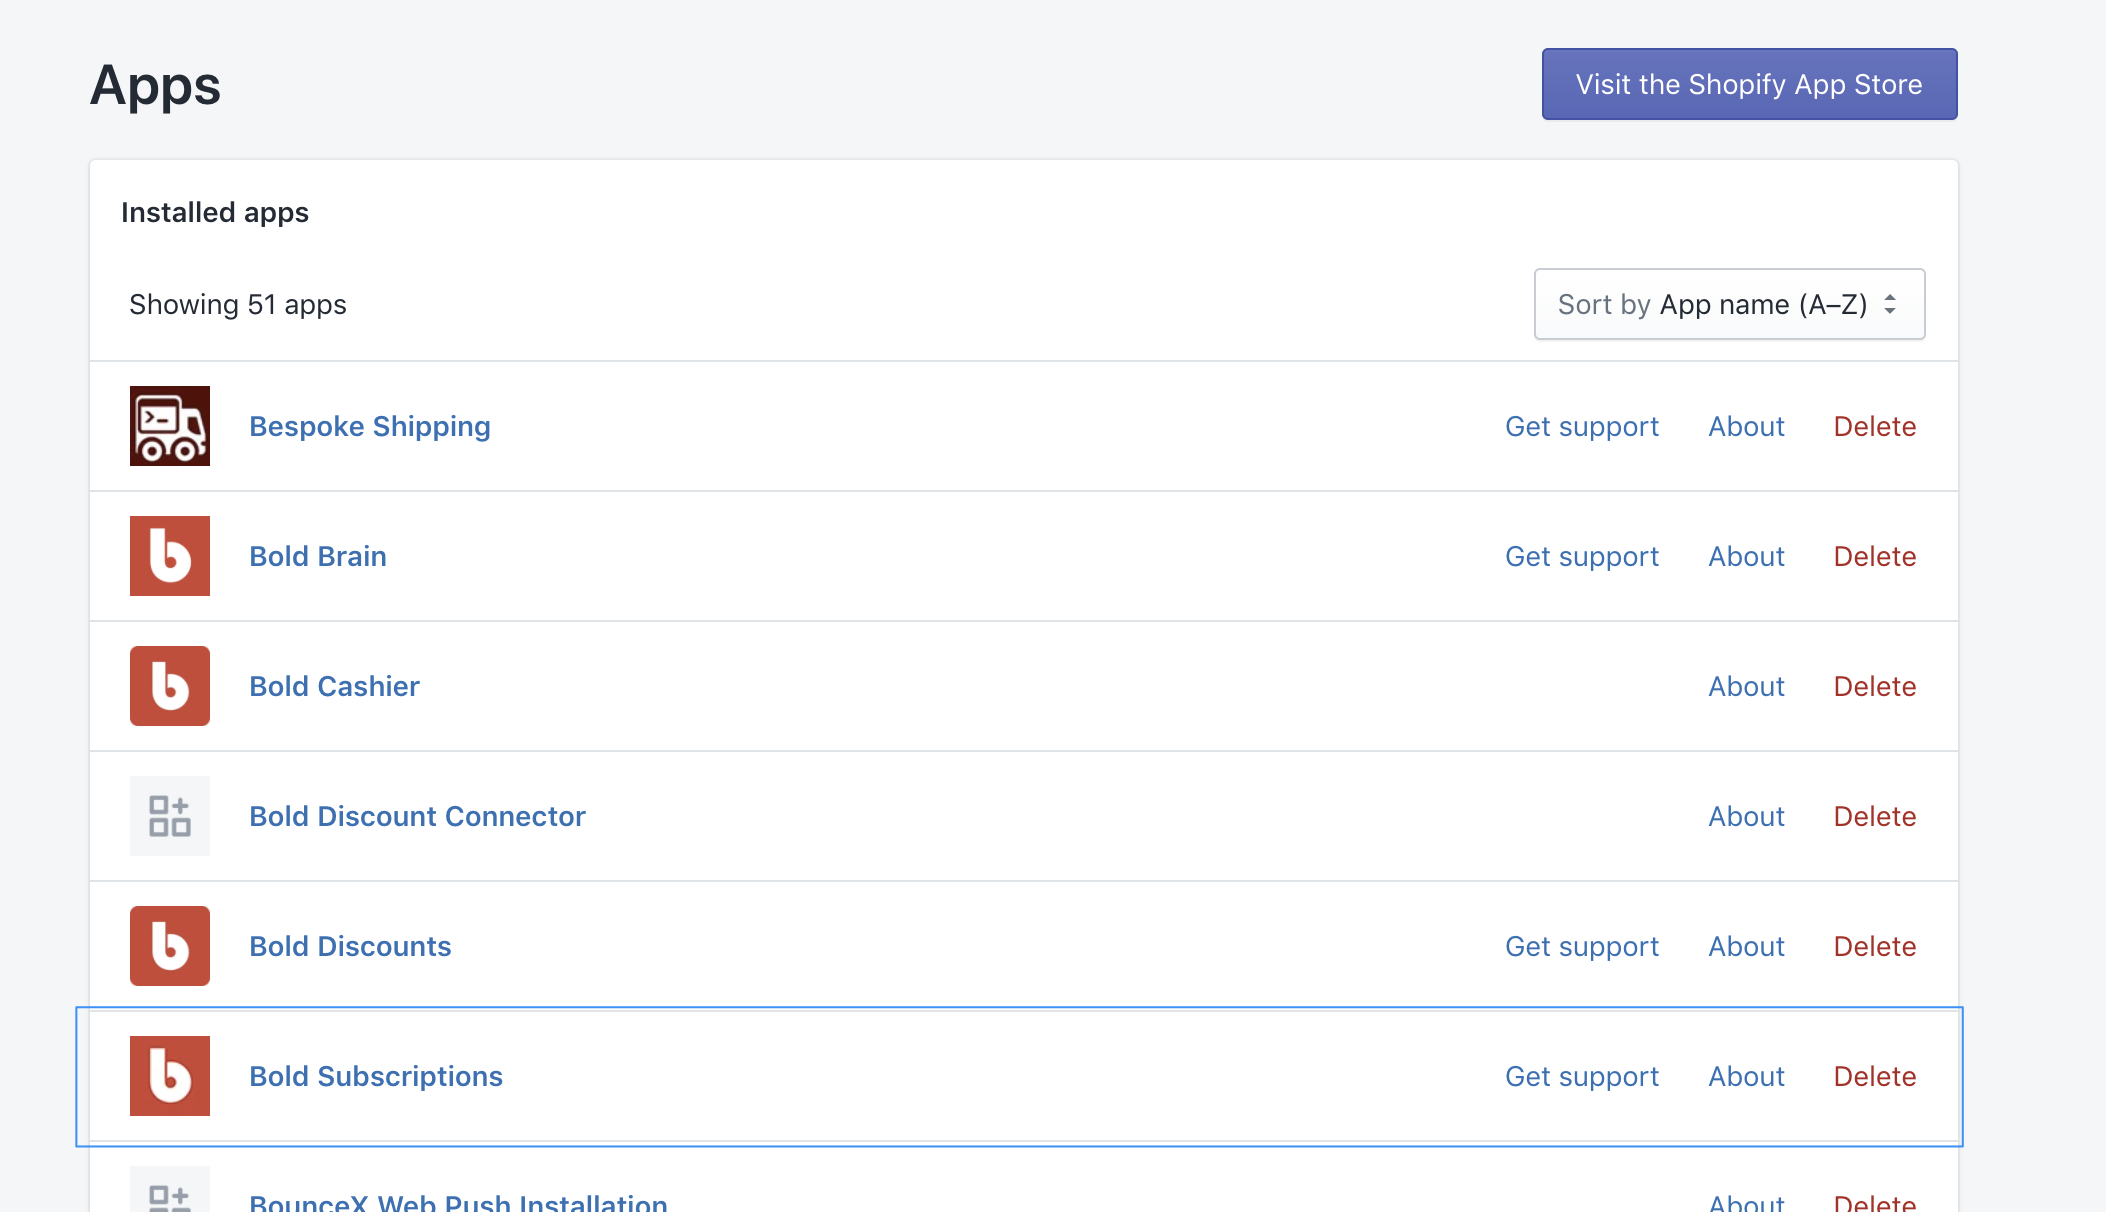
To generate an API Key in Bold, navigate to the Apps section of the menu:
Navigate to the Bold Subscriptions App:
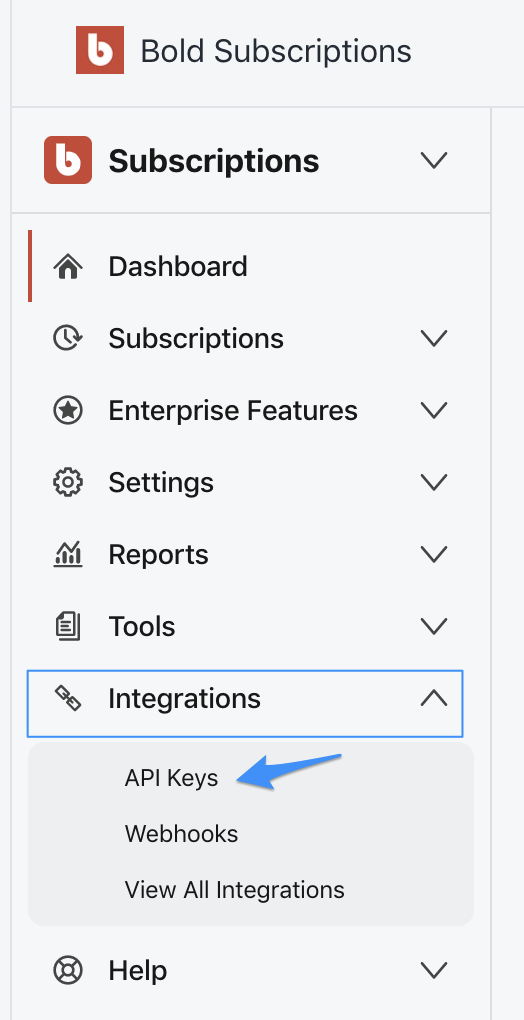
Click on Integrations and then API Keys:
Click Create Private Key:

Input "Sublytics" as the Handle in the pop-up box:

This will generate your Sublytics Bold unique API key:
![]()
Step 3: Add API key(s) to Sublytics
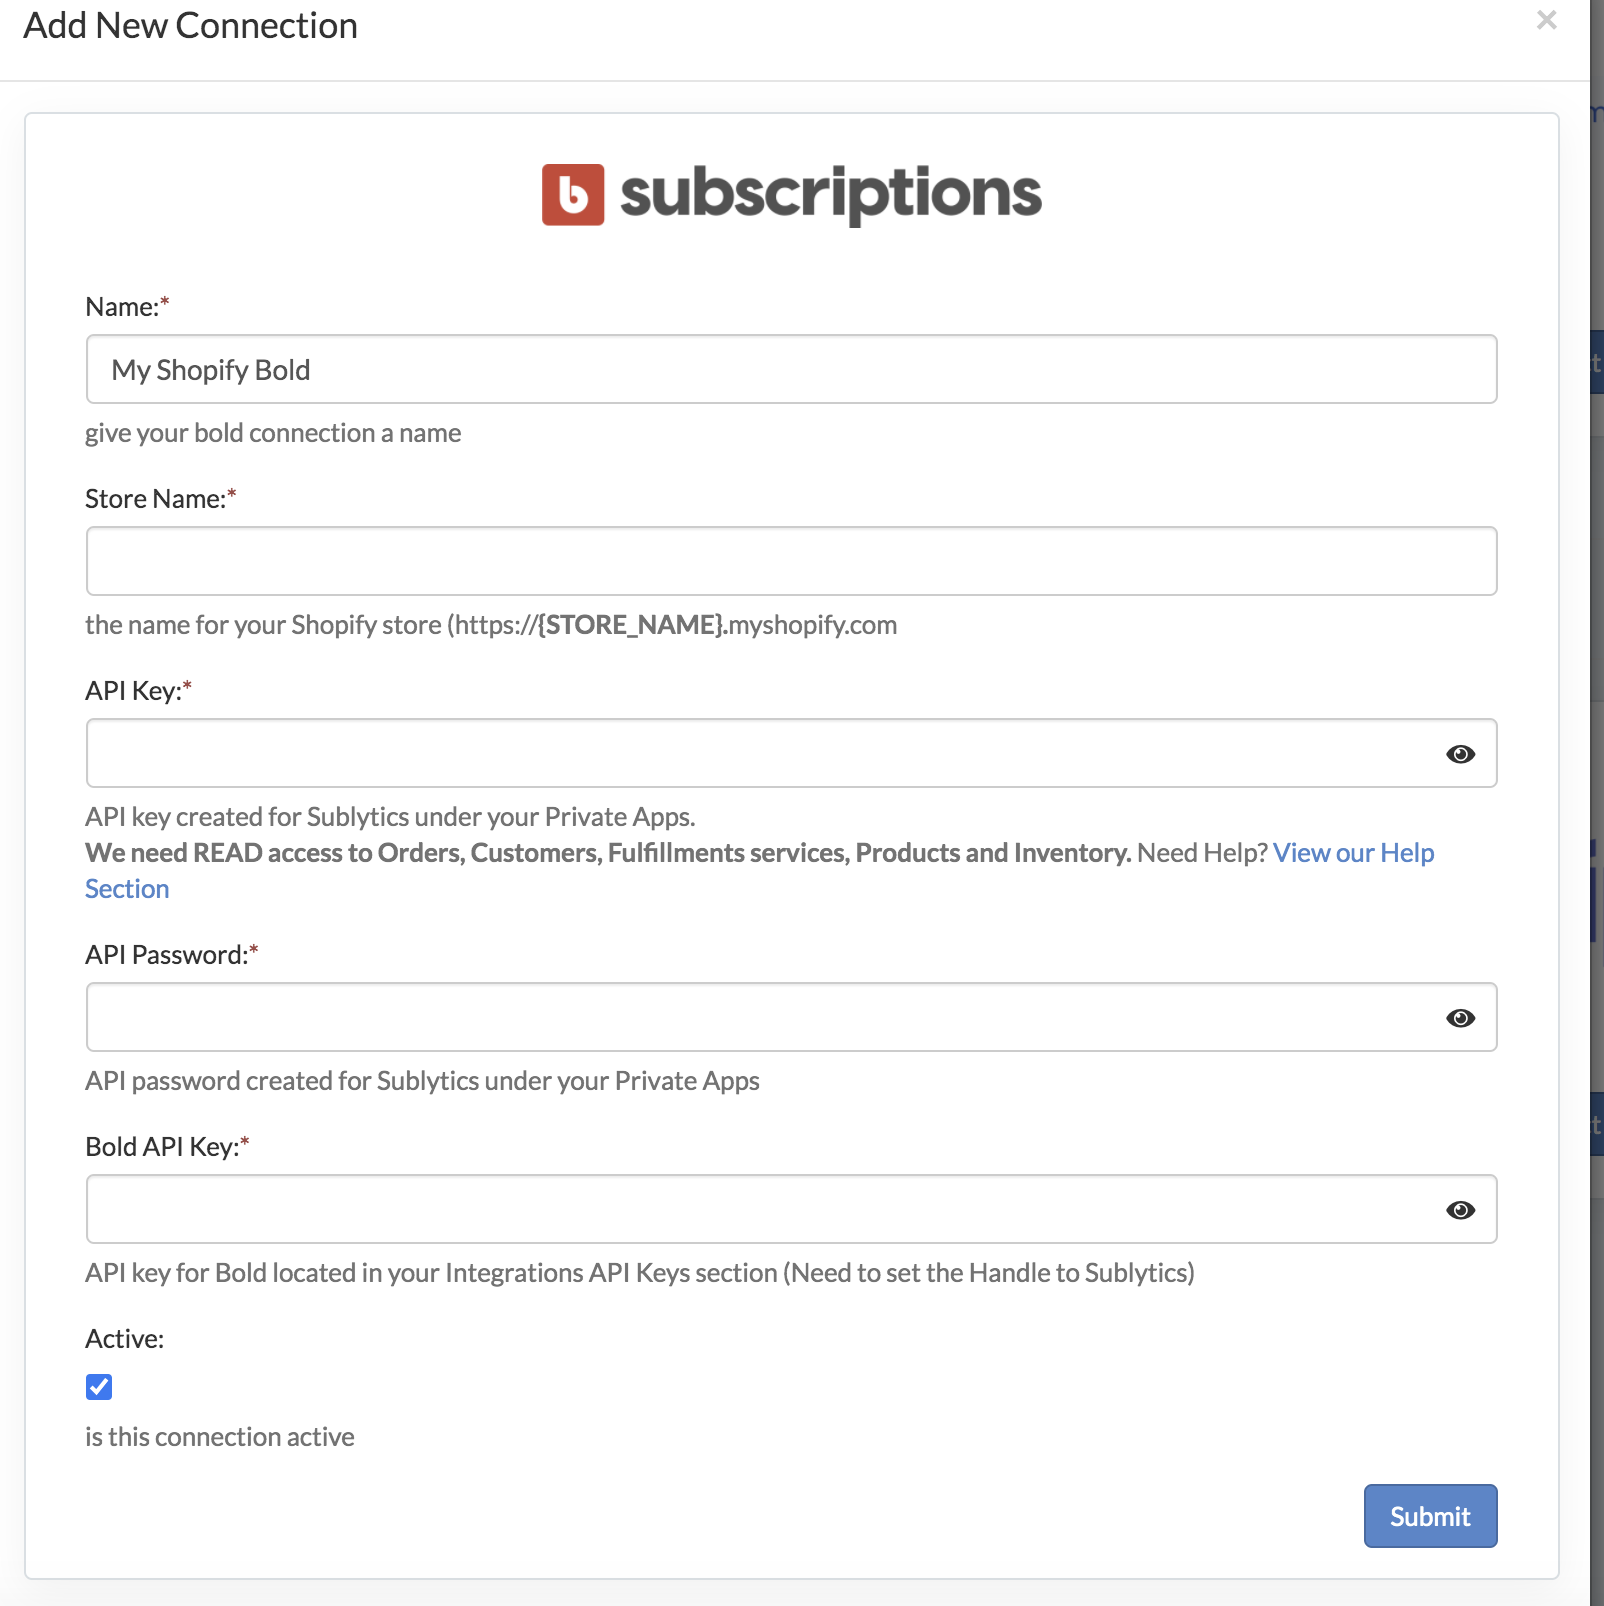
If you're signing up online, the below configuration panel will be available. If you are already signed up and connecting after the fact, you will need to navigate to the "Connections" tab of the menu and add a new connection. Our help desk article on adding new connections is located here.
Name the store to whatever you'd like, put the actual store domain, API key and Password for both Shopify and Bold. Note that for the Store Name, please put your store name only. Do not add the "https://" or ".myshopify.com." For example if your store URL is https://JoesStore.myshopify.com, please only put JoesStore in the Store Name field.
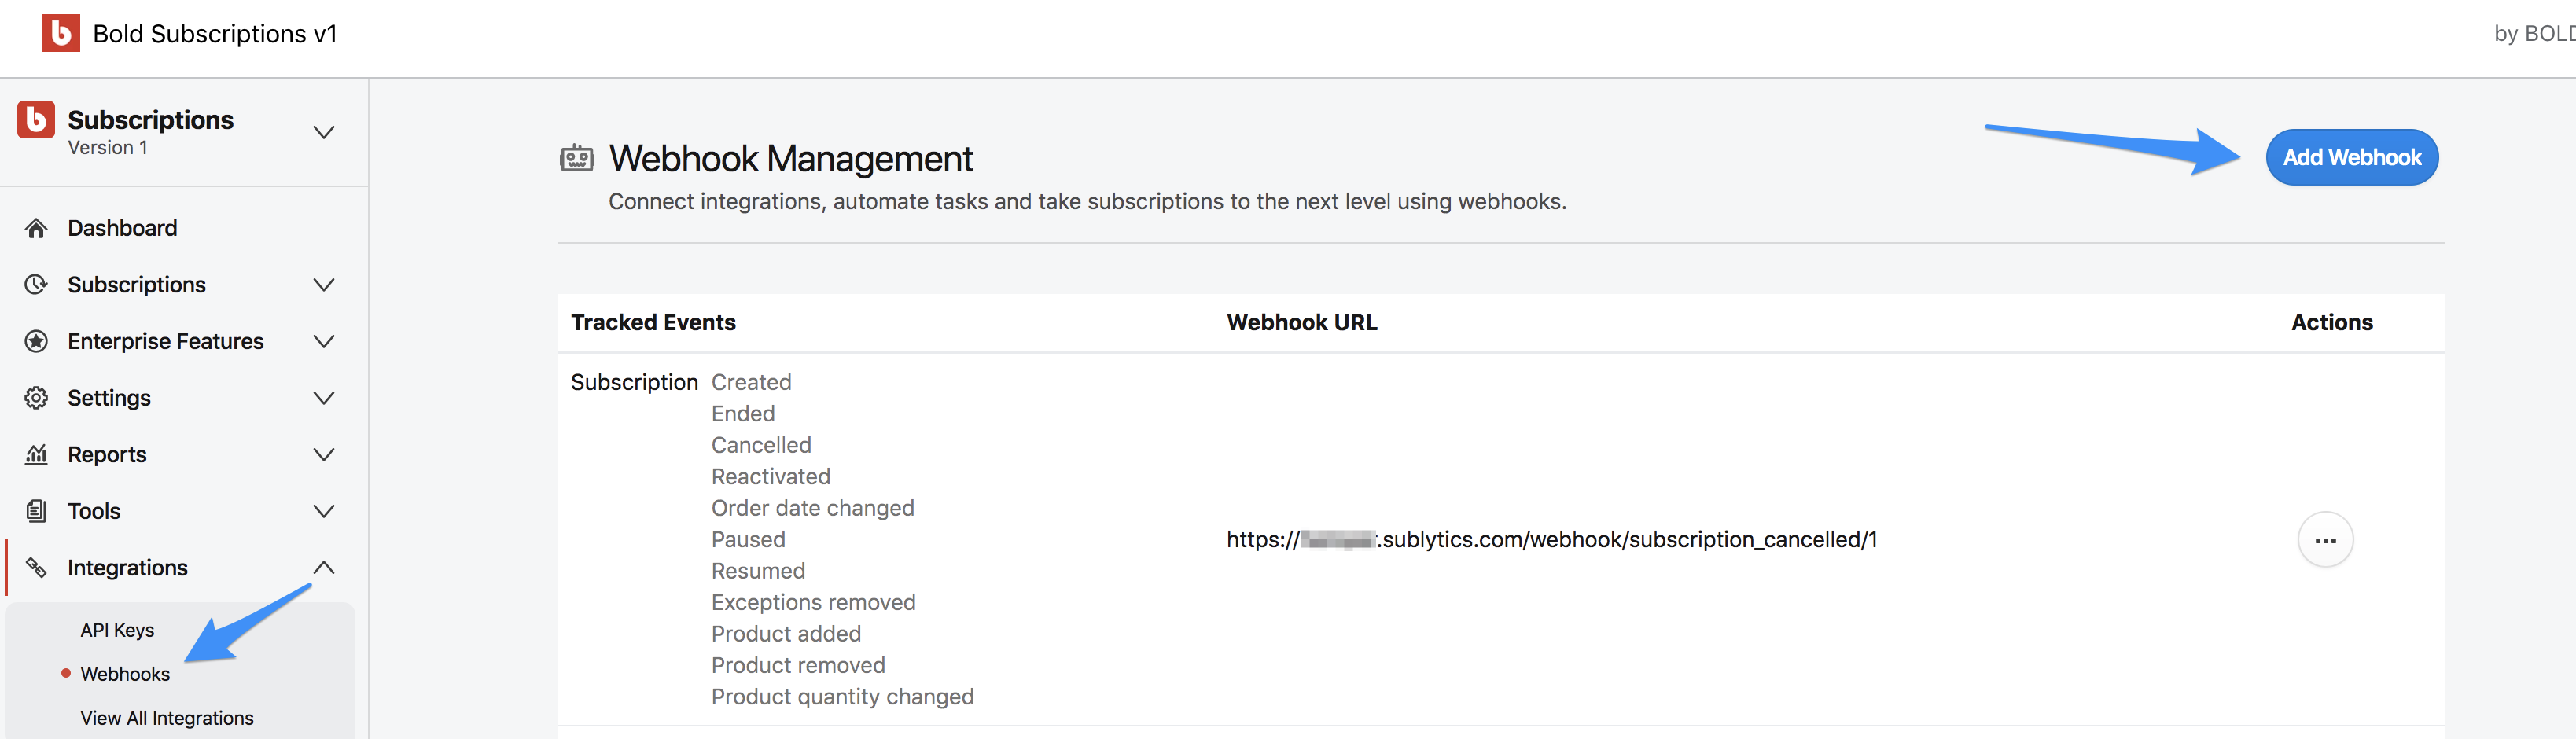
Step 4: Add Webhooks in Bold Subscriptions App
Navigate to the Bold Subscriptions app then Integrations > Webhooks and select Add Webhook
Your webhook URL will follow this format:
https://{sublytics_instance_URL}/webhook/subscription_cancelled/{sublytics_connection_ID}
- Your Sublytics instance URL will be where you log in to your Sublytics Account, for example demo.sublytics.com. Select all subscription events.
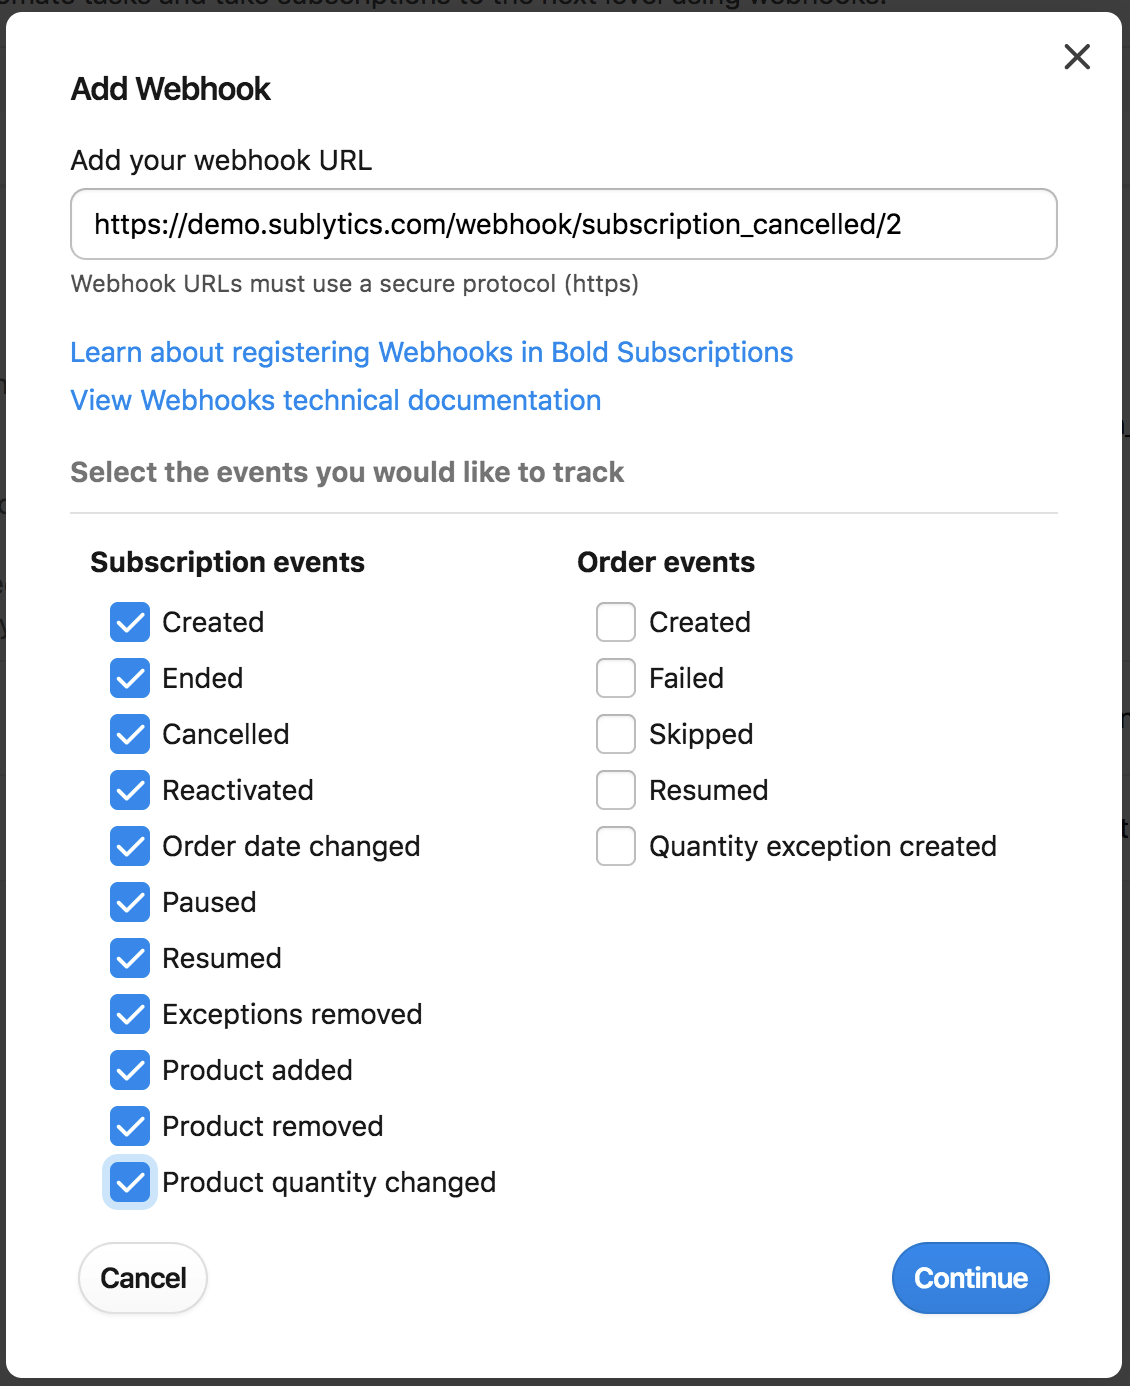
2. Your BOLD connection ID is the identifying number on the left column in your connections section of your account.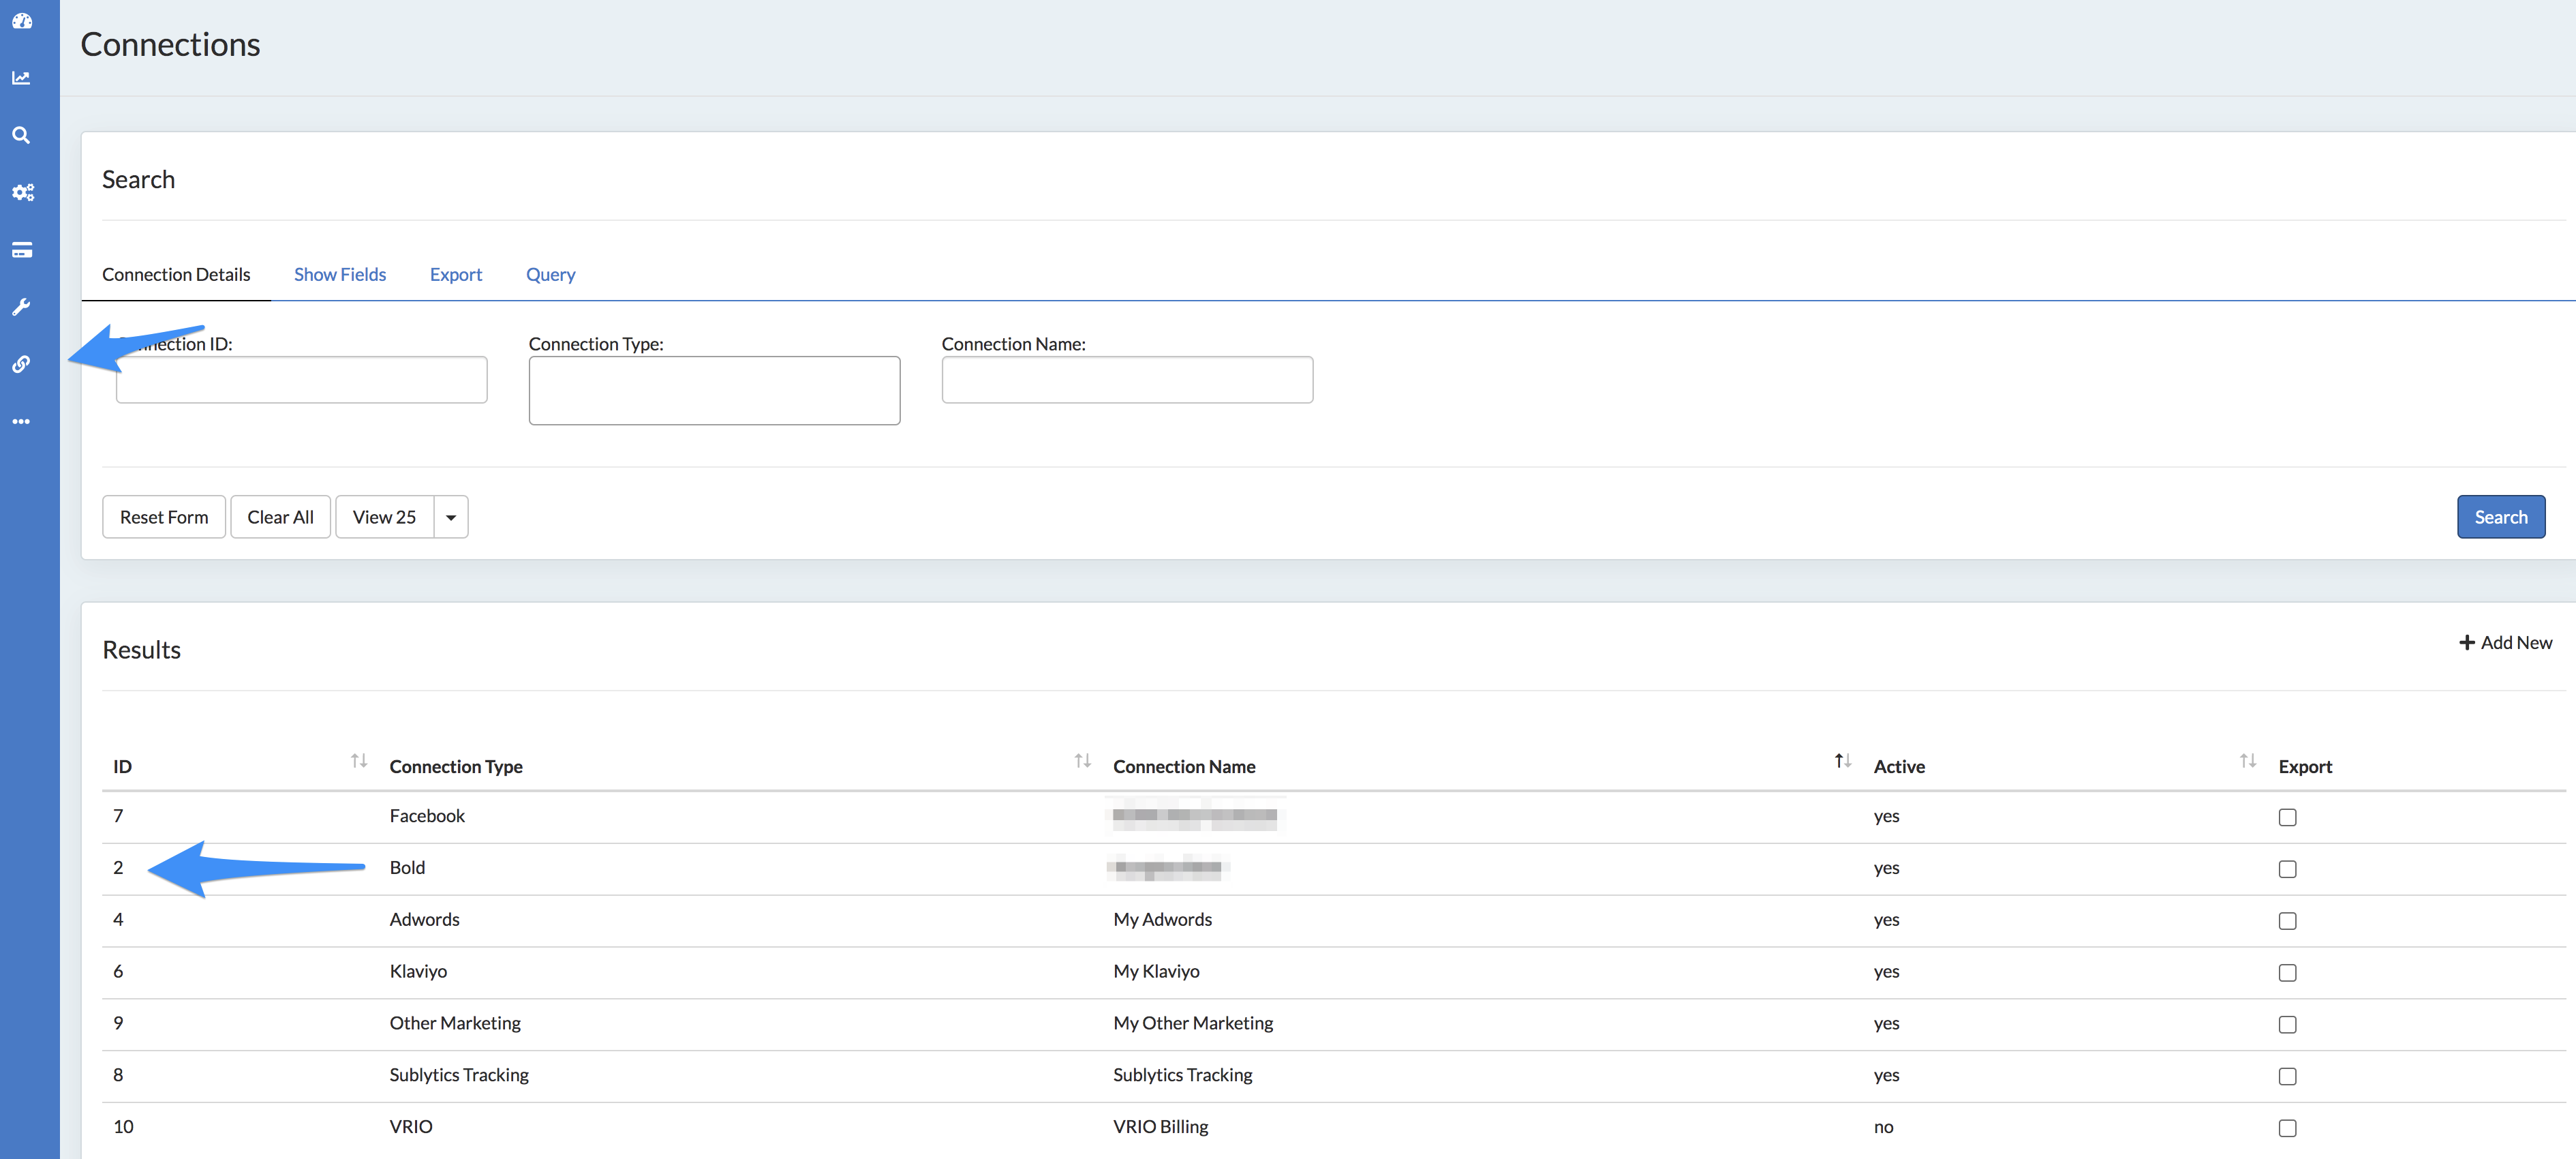
Once the API has successfully connected, Sublytics will collect the previous 90 days' worth of data. Remember, you can unlock a full 6 months worth of data by adding in a payment method. You can learn how to do this here.
Depending on the size of your business, the backfill can take several hours and a progress bar will indicate the status of historical import. Reach out to support@sublytics.com to expedite this process.
With your store connected, you will see data come through most of the reports under the Analytics section of your menu, and you can start to dive into your Customers, Finance, Subscriptions & Fulfillment reports. To Leverage Sublytics Marketing Analytics, this guide will walk through setup of your Marketing Connections.