Bring Sublytics into your Inbox!
You can schedule any report to deliver into your inbox or set an alert on a specific metric so that you are notified before it becomes a problem or know when to celebrate a success.
Get Started
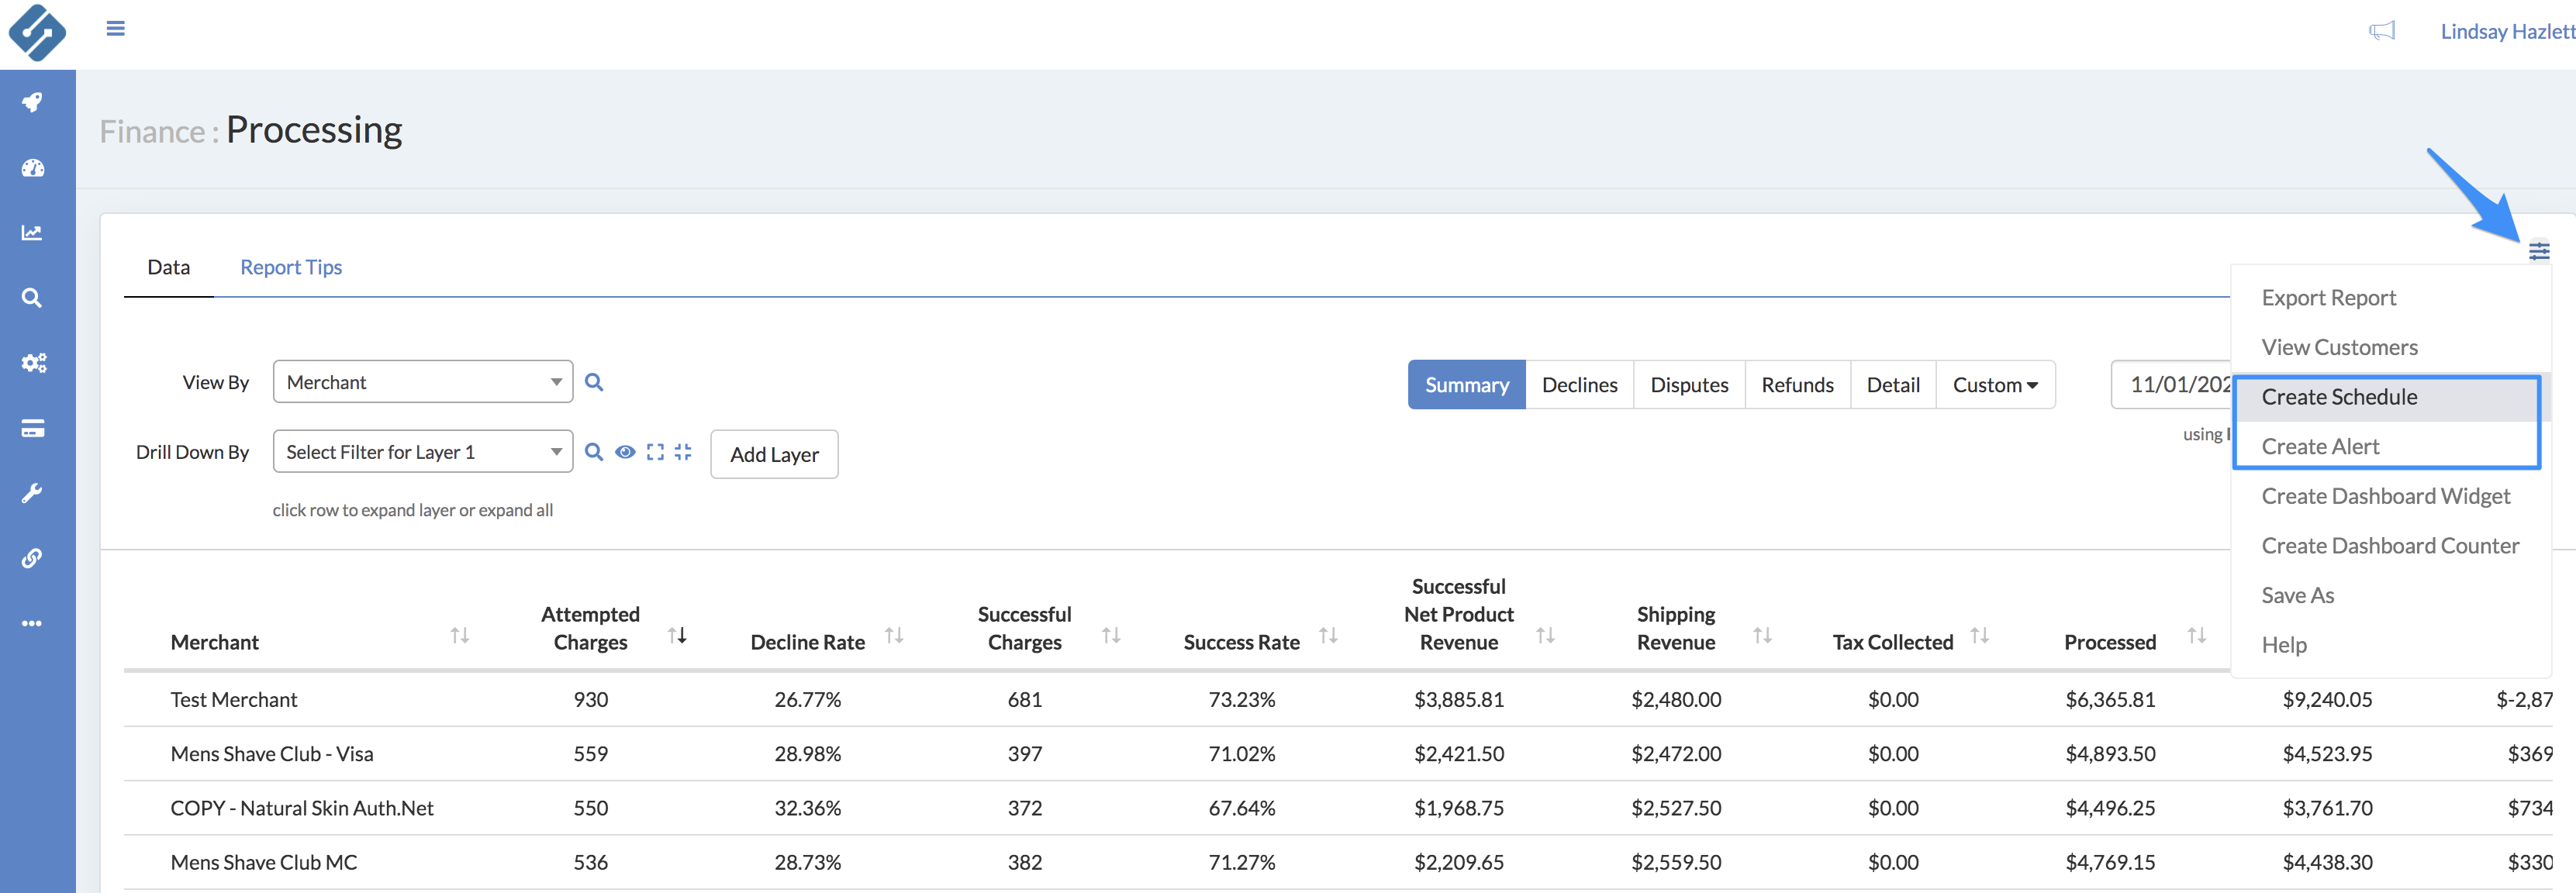
First, identify the report that is most valuable for the Alert or Scheduled Report and select the Options menu on the top right-hand corner of that report.
Setting a Schedule:
A scheduled report will take metrics from a report and deliver it to your inbox. Remember this will always tie back to the selected report, so taking note of the Date Operator is crucial. If you would like to see the metric with a different Date Operator, then you should reconsider what report you are building from. Learn more about our Date Operators here.
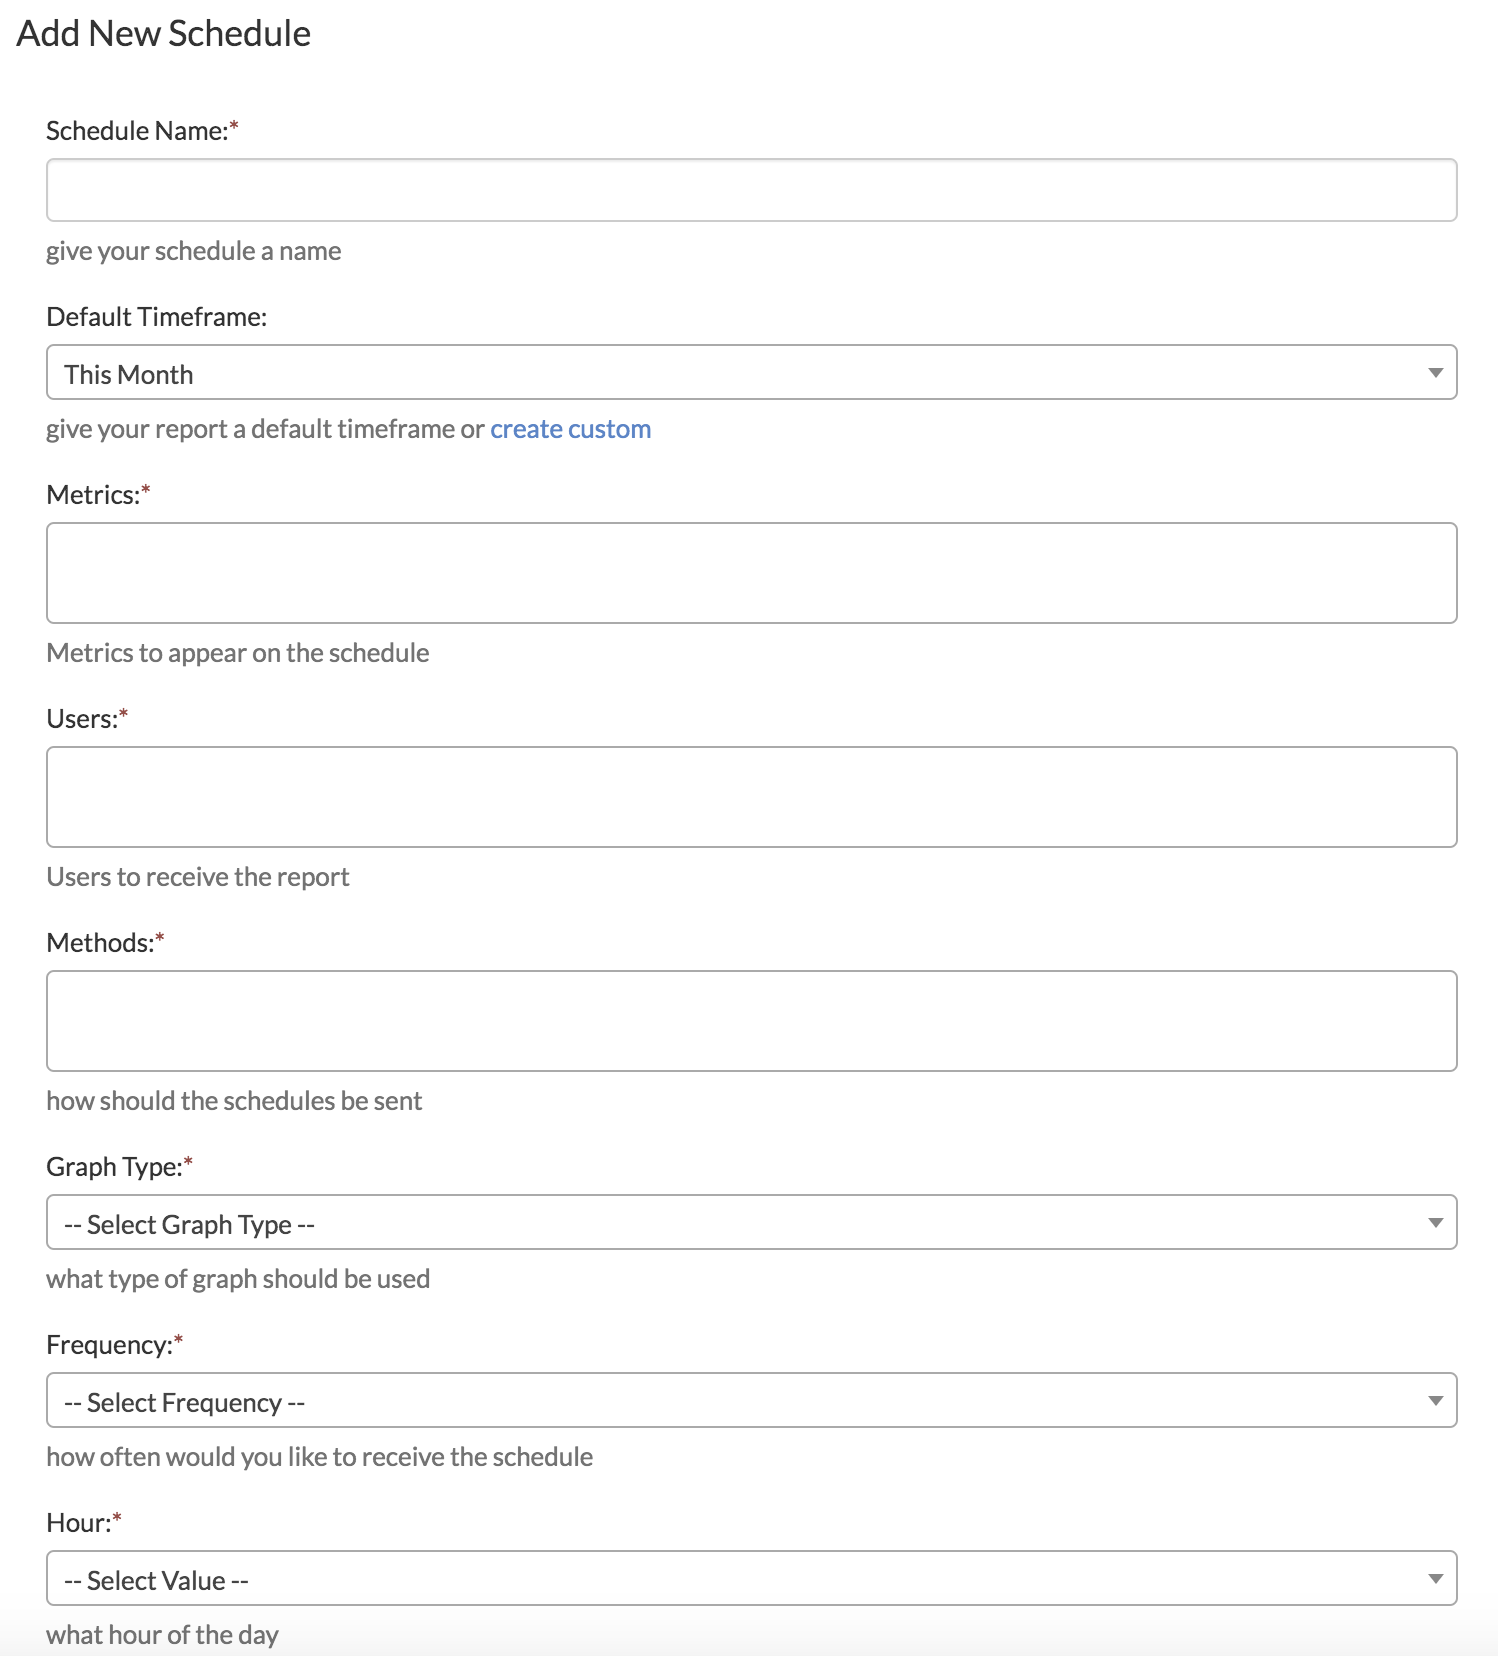
When the configuration panel opens, walk through the setup to select what you would like to see arrive in your inbox.
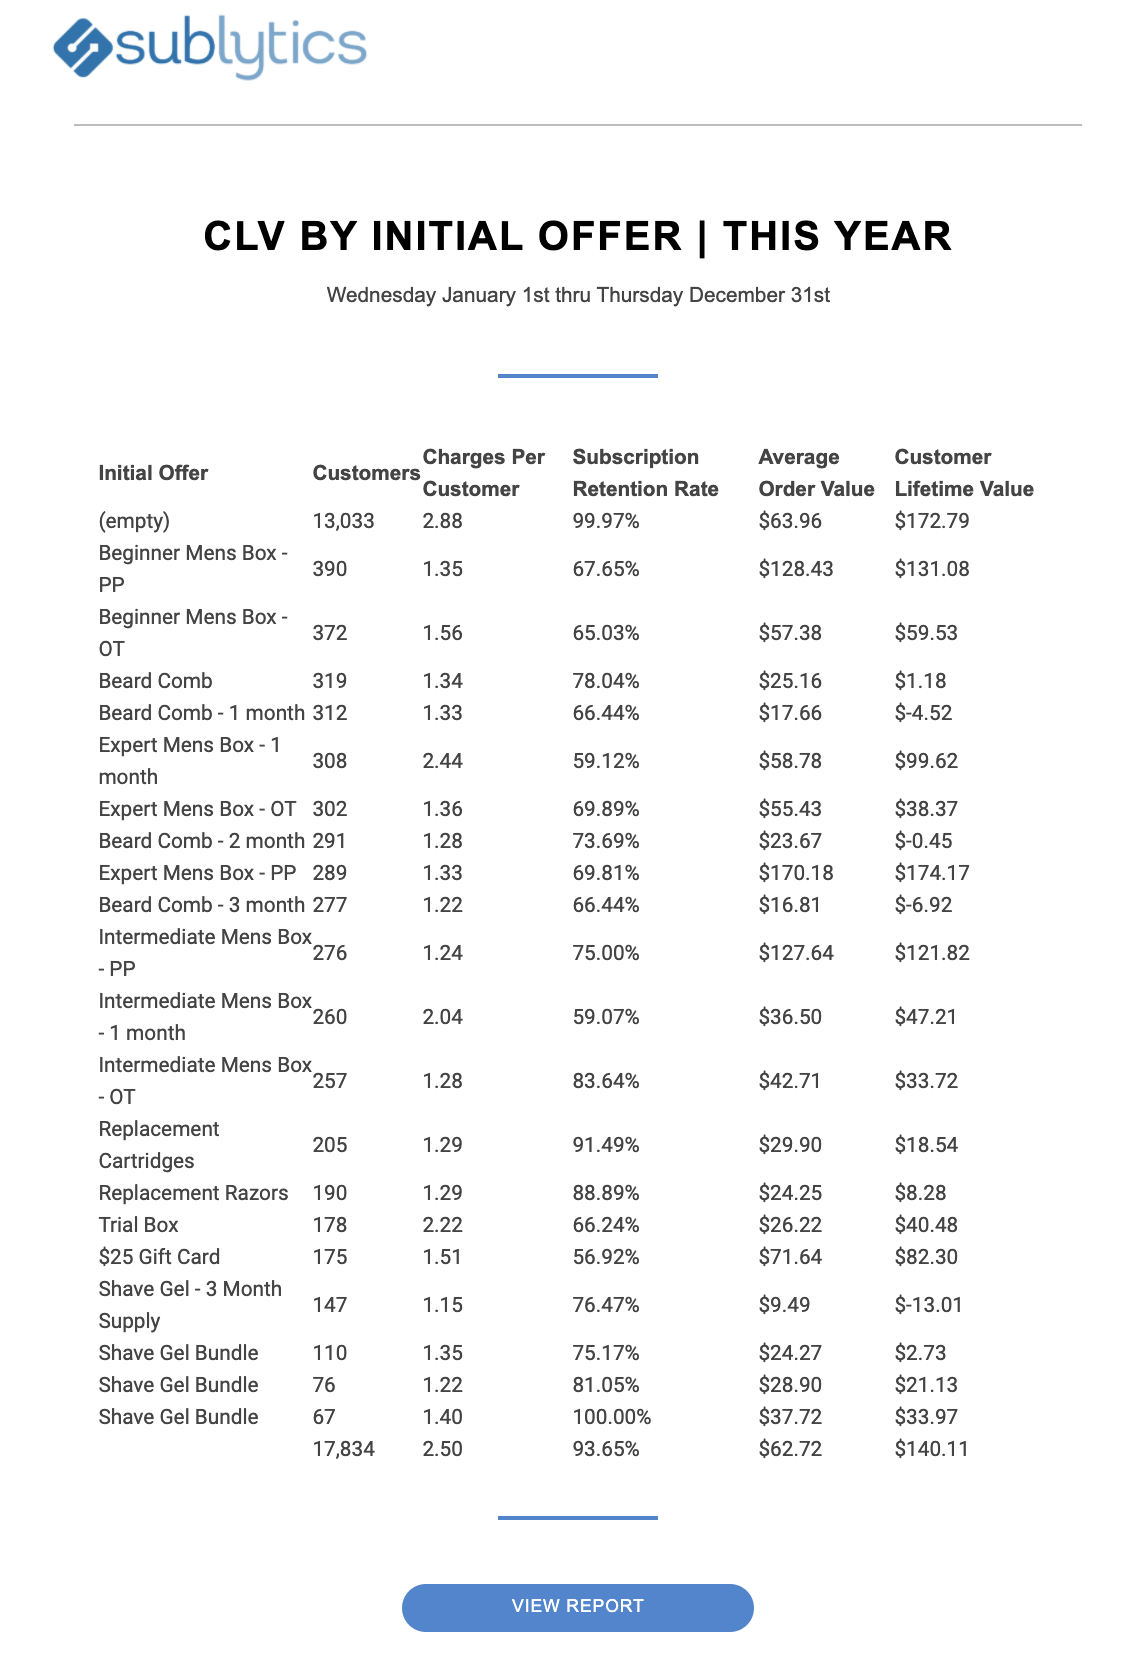
You have the option to deliver the data as a graph trended over time or a table. If you are looking to review multiple metrics within a single data view, it's recommended to schedule as a table. Here's an example of how it will display within the email.
Table View:
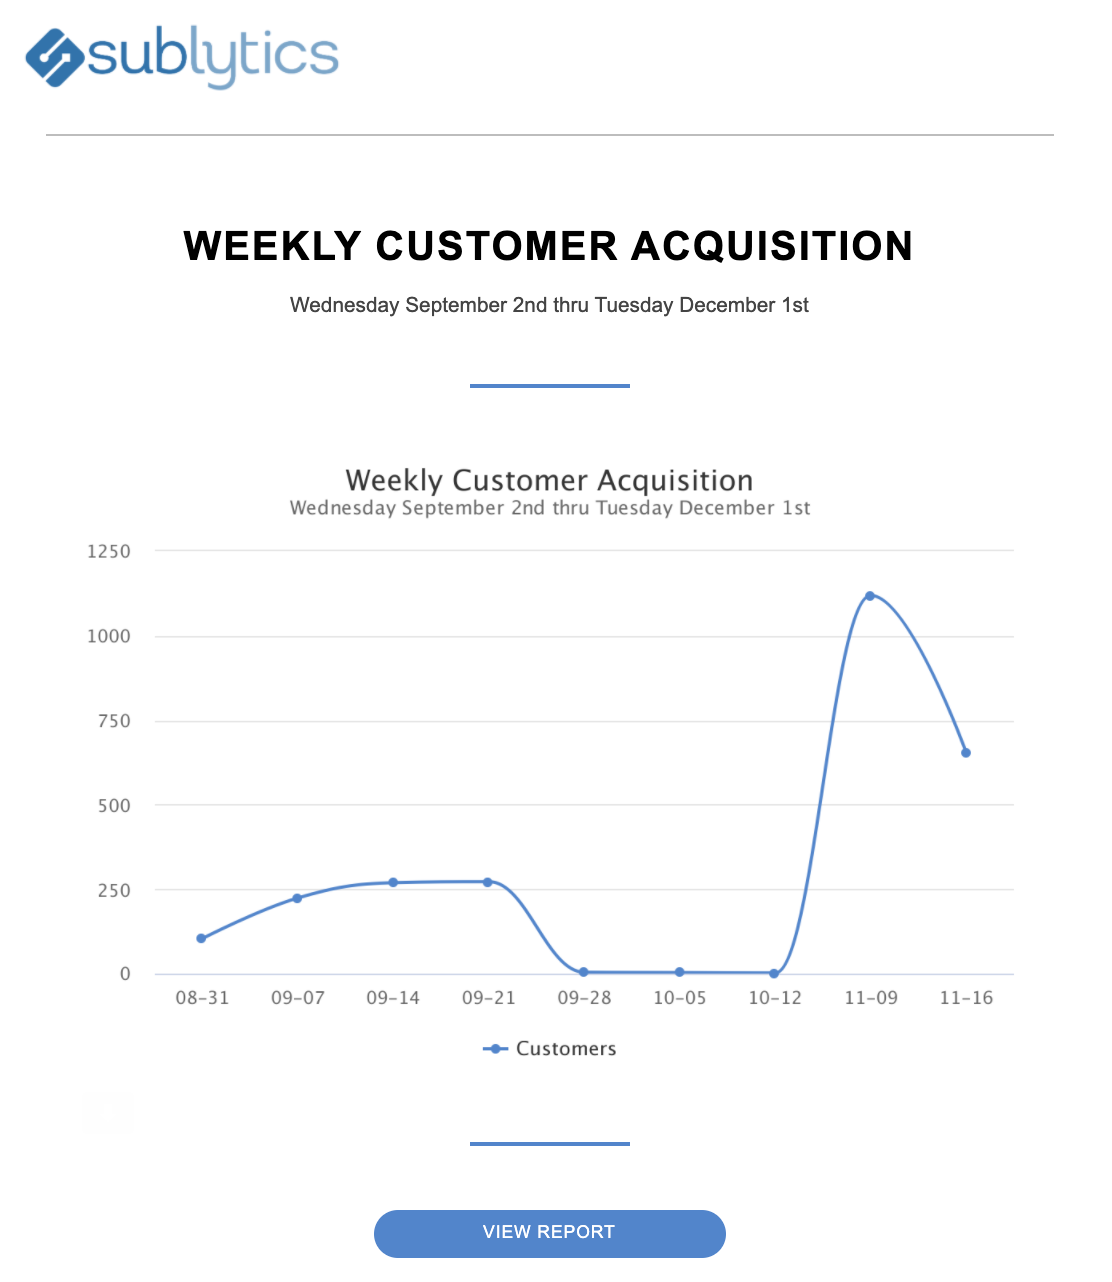
If you are looking to review a single metric trended over time, it's recommended to schedule as a graph with 'Overall' set as the View By filter. Here's an example of how it will display within the email.
Graph View:
Editing an Existing Schedule:
You can edit an existing Scheduled Report or add/remove users by navigating to: Customization > Notifications > Schedule Reports.
Setting an Alert:
An alert will also deliver a notification to your inbox, but only when the selected metric surpasses or drops below a specific predefined number or rate. Below are a few popular metrics that customers find valuable for notifications.
- Decline Rate is above threshold
- Reattempt Rate (for declines) is below threshold
- Cancellation Rate is above threshold
- 24/ 72 hour cancel rate is above threshold
- Delivery Rate / Days to Delivery dips below threshold
Here's an example of what an emailed alert looks like:
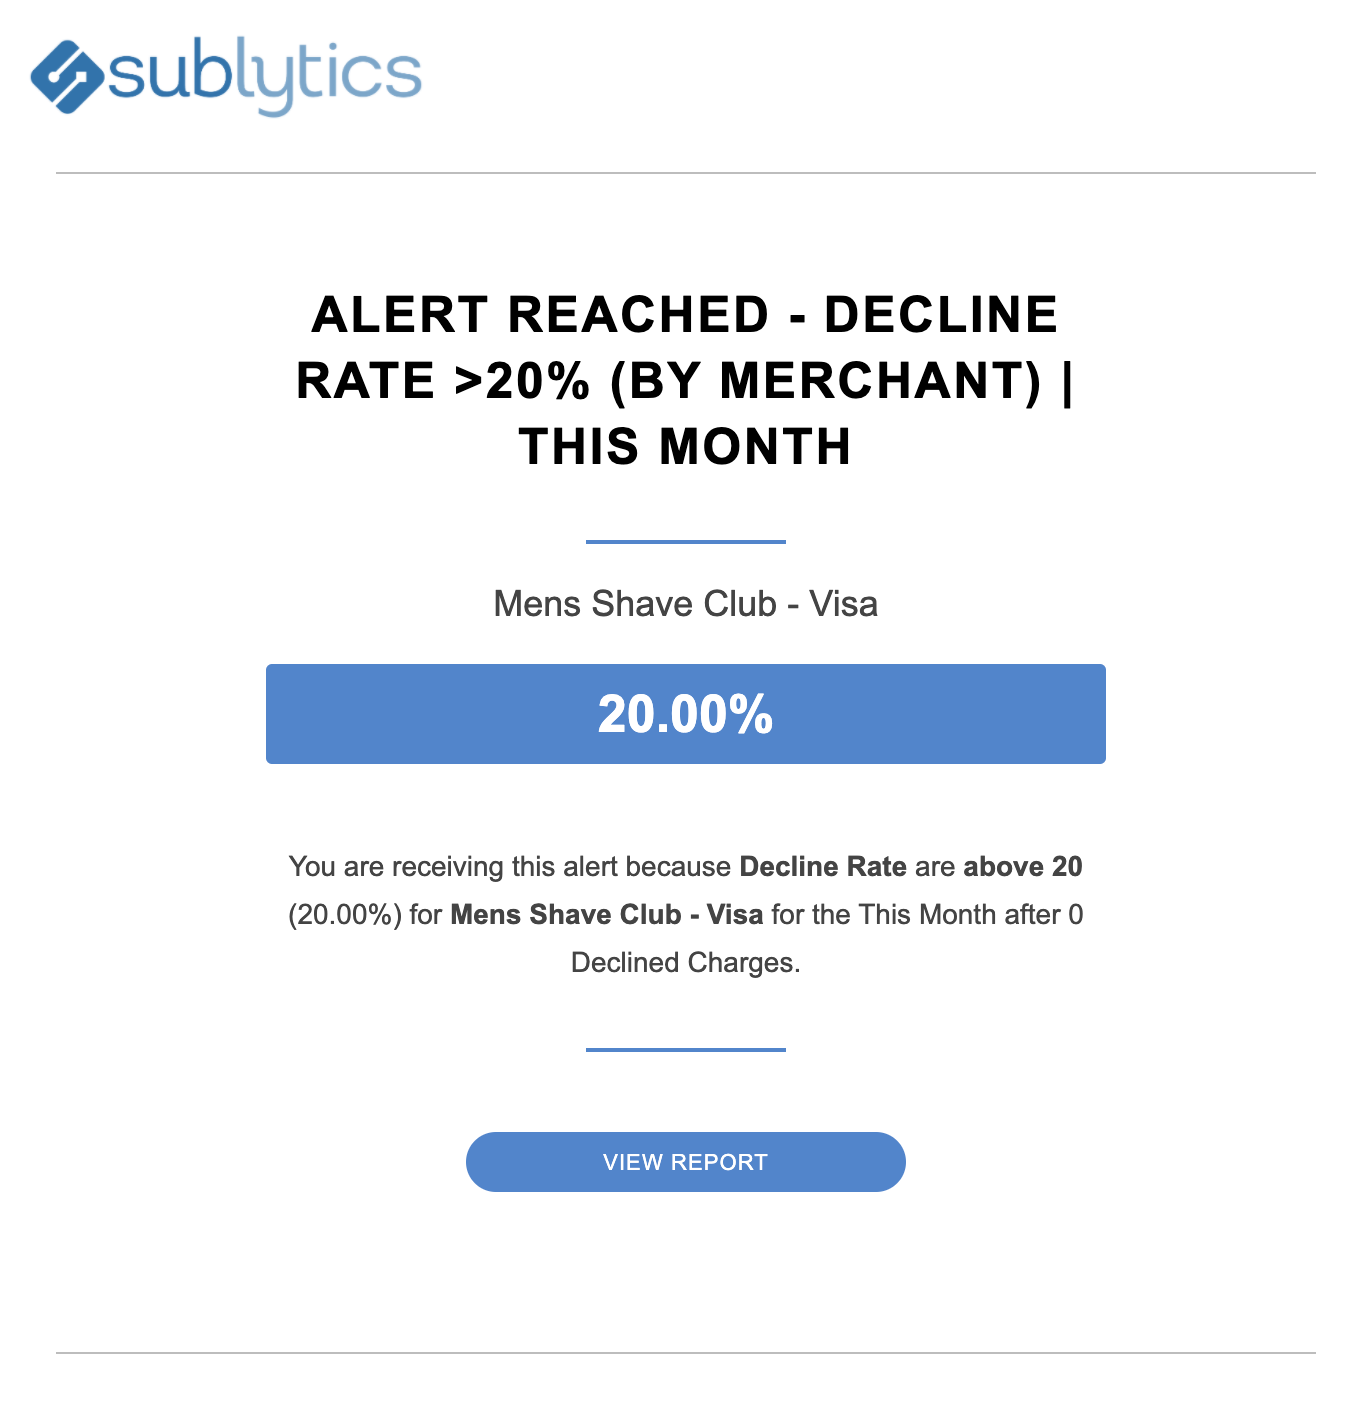
If you want to see the Alert based upon a specific filter (such as Merchant in the example above), set your View By filter how you would like the Alert to come through. For example, if you want to receive a notification when a certain chargeback rate is reached for a specific Merchant, you'll want to set that filter as your View By filter as your first step.
When the configuration panel opens, walk through the setup to select what you would like to see in your inbox.
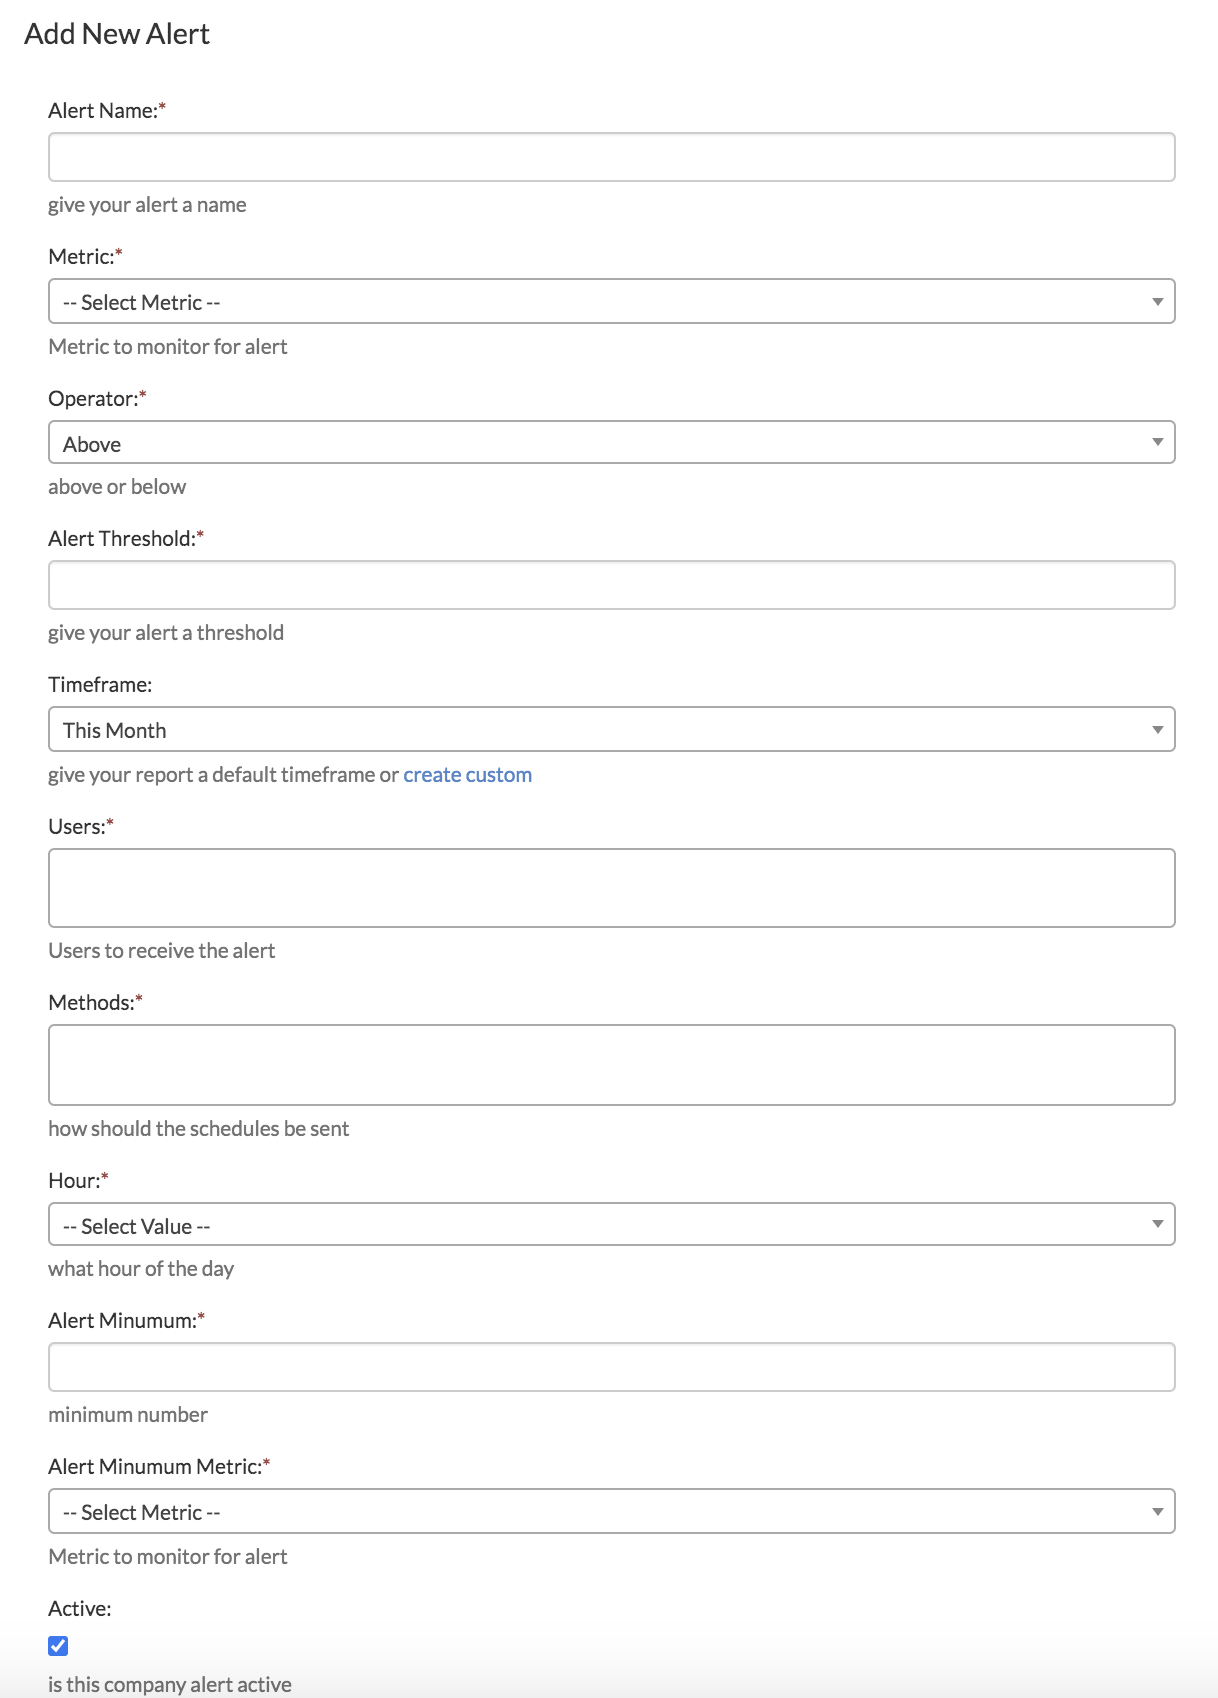
Use the metric, threshold and operator fields to determine the criteria for when you would like to be alerted.
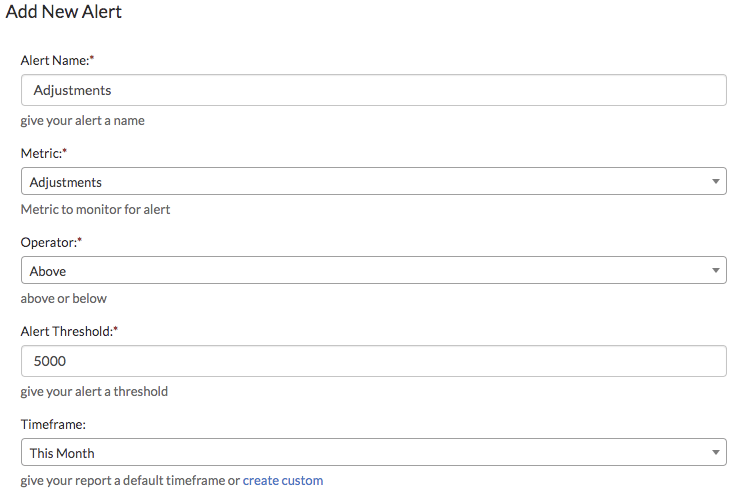
For example, if I would like to be alerted when my monthly Adjustments exceed $5,000, I would set it up as follows with my minimum set to 0.
However, if I know my customer service team processes a handful of refunds each month, so I only want to be concerned if the amount of refunds they are processing is over 10. I would then set my minimum accordingly:

If minimums do not apply to what you are looking to track, simply set the alert minimum to 0 and match the Alert Minimum Metric to the metric you selected above on the configuration panel.
Editing an Existing Alert:
You can edit an existing Scheduled Report or add/remove users by navigating to: Customization > Notifications > Alerts.