Campaigns are the final step for completing a setup. A creates a unified storefront for any group of items and offers. A Campaign is the container in which Offers being sold and payment engine logic resides.
Reasons why you may have multiple Campaigns:
- Unique Storefronts or unique Checkout Settings
- Different sales strategies utilizing unique Payment Routers
Any additional differences is sales strategies can be defined through Tracking Variables, instead of creating multiple campaigns just for analytics.
Use this guide to find more information on your campaigns and checkout settings.
In this Section
Adding and managing Campaigns
More about campaigns.
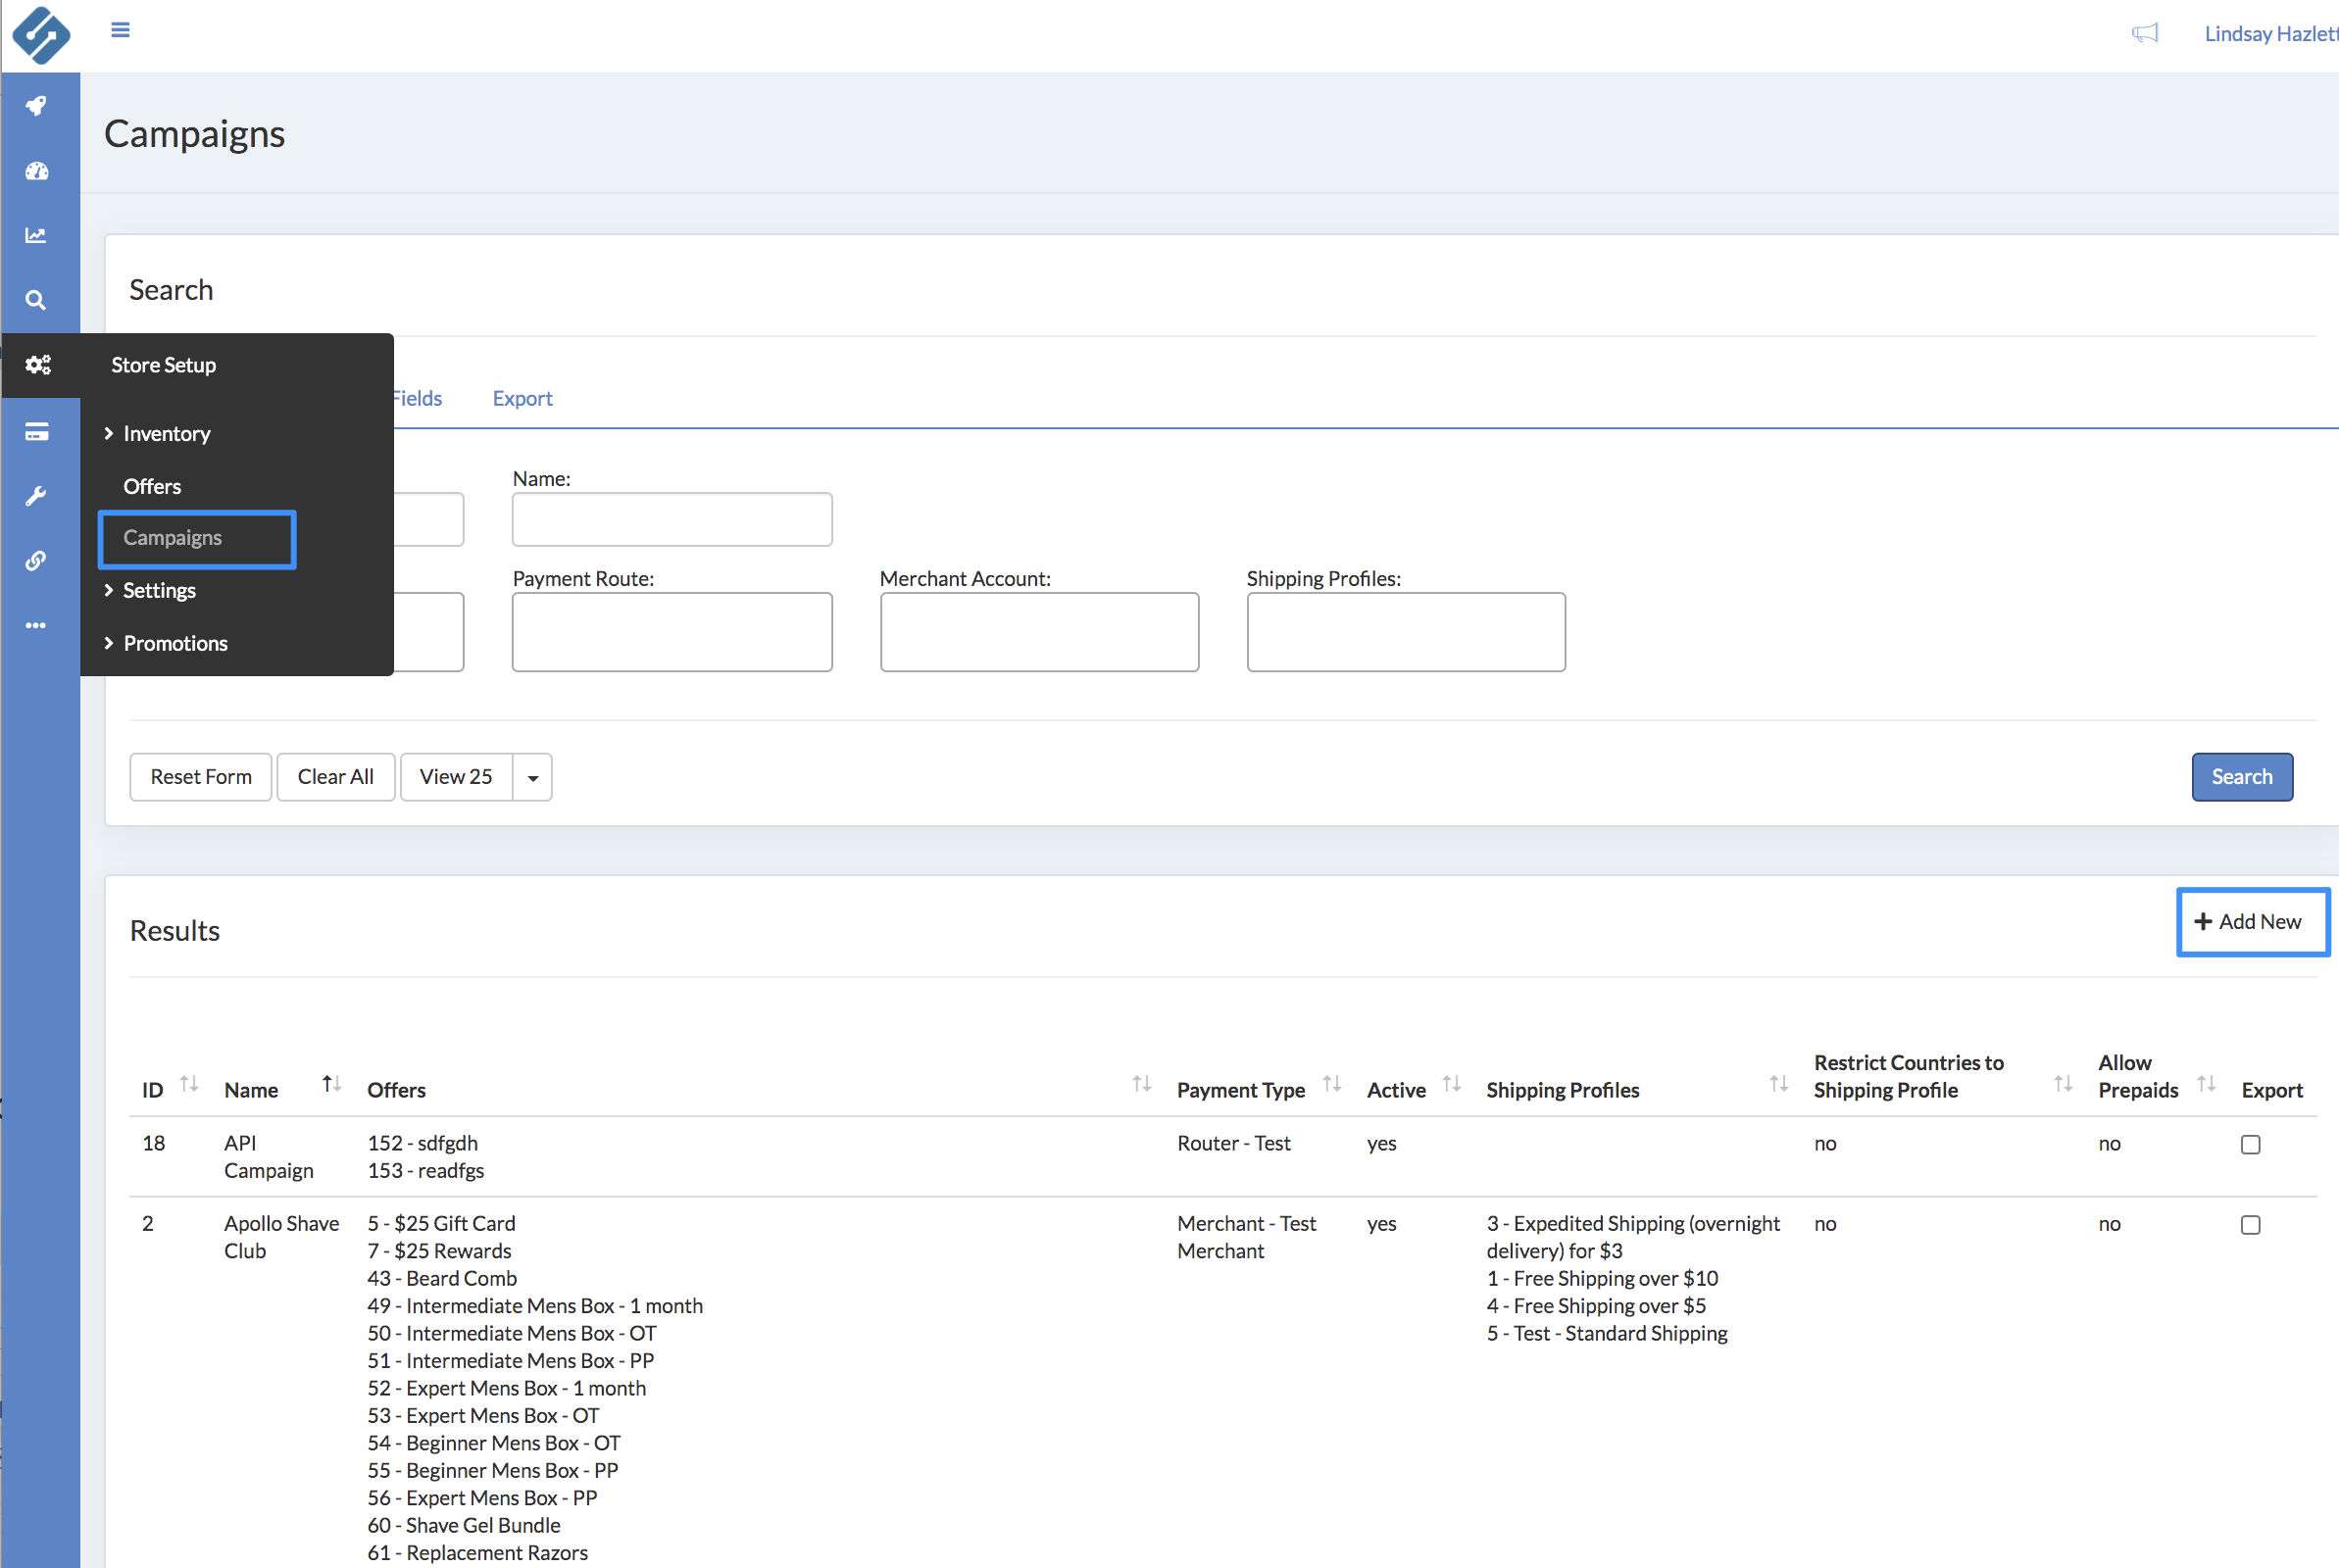
How to Add a Campaign
- In the Home Menu hover over Store Setup
- Click Campaign then + Add New or click on the Campaign you would like to edit
- Enter your Campaign details
(click to expand)
Set as many details about your campaign as possible. The more you add, the more you will be able to analyze in your reporting.
- Name
- Name of the Campaign
- Offers
- The Offers tied to the campaign
- Payment Type
- Merchant or Router. Learn more about Merchant Routers here
- Merchant Account
- Select the merchant account you would like to use for this campaign
- Shipping Profiles
- Shipping Profiles available for this campaign
- Restrict Shipping Profiles
- Check box if you would only like to allow orders on this campaign to come from countries in the shipping profiles attached
- Countries to allow
- Define the countries allowed for this campaign
- Allow Prepaids
- Select if the campaign allows prepaid cards
- Refund Expiration
- The number of days that a refund can be processed after a transaction is completed
- BIN Block profile
- choose a bin profile to block bins for this campaign
- Fraud Connections
- Select the Fraud partner you would like to associated with this campaign
- Address Validation
- Select the Address Validation partner you would like to associated with this campaign
- Tax Connection
- Select the Tax Connection you would like to associate with this campaign
- Tax Profile
- Description of Item. This is visible to your customers on the product page. Use HTML here if you would like to format your description.
- Campaign Responders
- Set responders for your entire campaign
- Campaign Pixel
- Add tacking pixels to collect information from this campaign
Limit Campaign Duplication
Use custom Tracking Variables for reporting metrics to limit the duplication of campaigns. Example - use permission levels by AFID for users instead of creating a new Campaign for every AFID
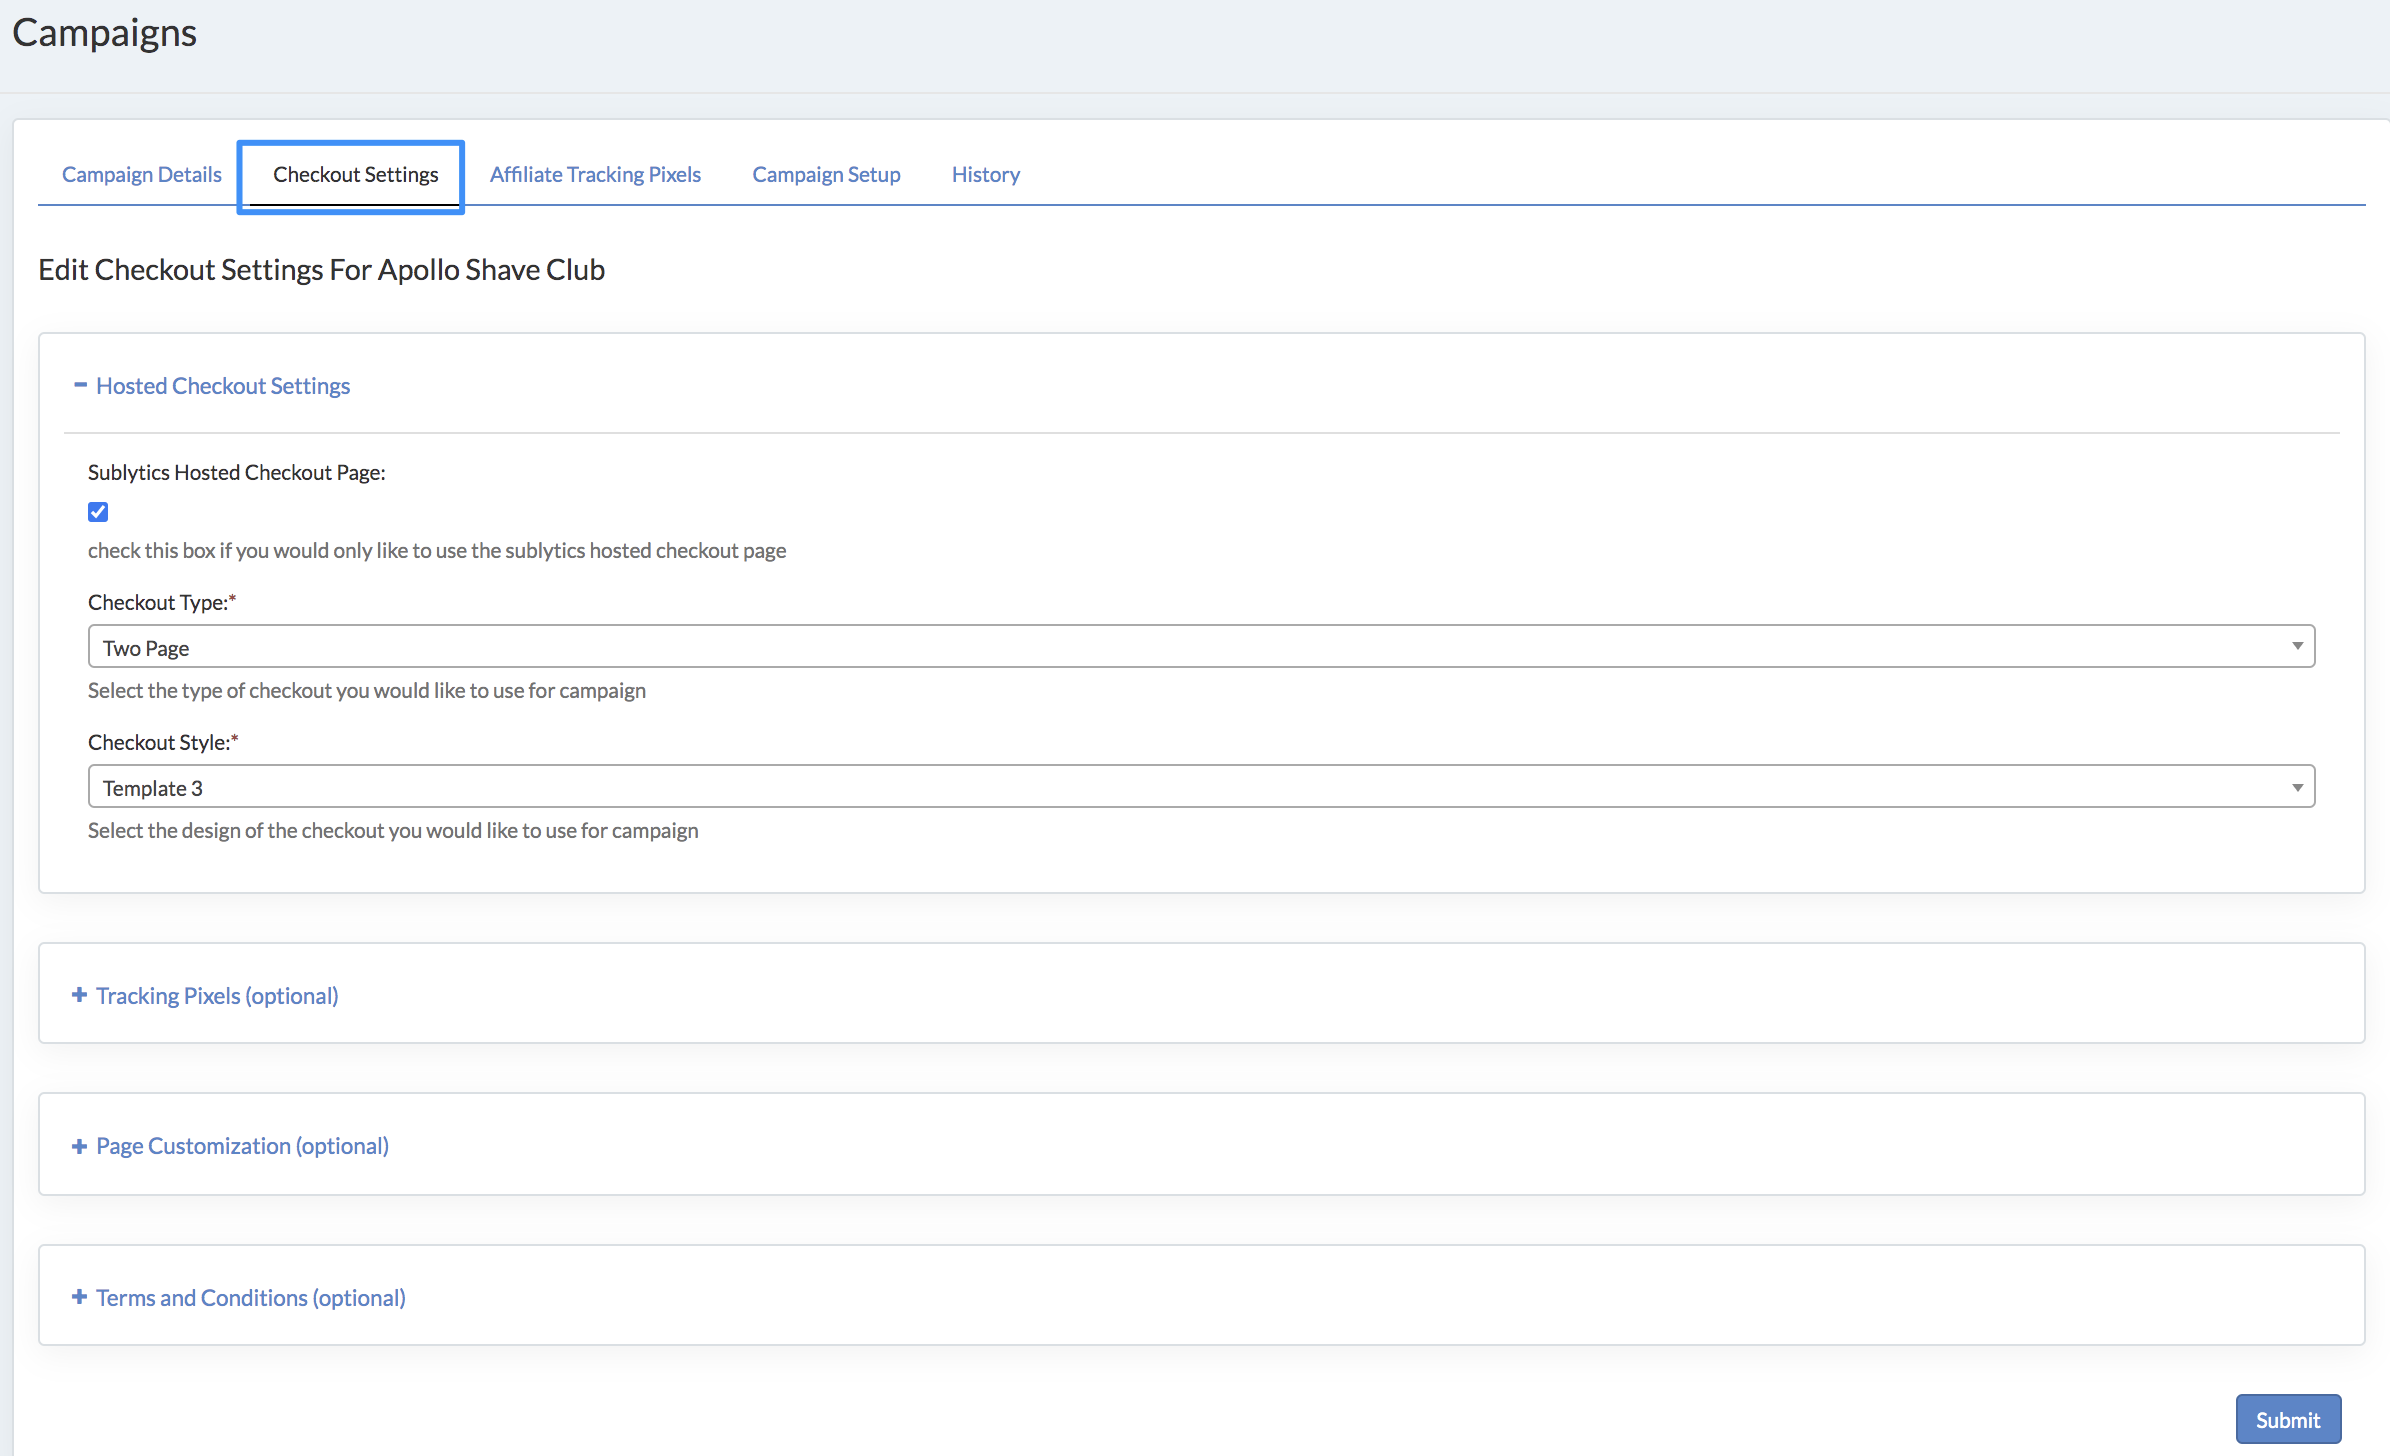
Define your Checkout Settings
How to update your Checkout Settings
- In the Home Menu hover over Store Setup
- Click Campaign then select the Campaign you would like to edit
- Enter your Campaign details
(click to expand)
Hosted Checkout Settings
Sublytics offers both a single and two-page checkout types for you to choose from. Select your preference depending on your business and the way you would like to collect your customer's information. More information about Checkout Types here.
You will also select the Checkout Style for your page by choosing between our three Checkout Templates. More information about Checkout Template Styles here.
Campaign Tracking Pixels
You can assign already connected tracking pixels to your checkout all within the Campaign Tracking Pixels section of the Checkout Settings. Since Sublytics has integrated with Facebook, Google AdWords and Email Marketing partners you do not have to specifically place a pixel within the campaign settings. Instead, select the connections you would like associated with your campaign.
Example: You have two campaigns and only want one campaign associated with the active Klaviyo connection. Simply click into the campaign you want associated and select MyKlaviyo under the Marketing Connection drop down.
For Facebook and Google Ads, add in the Facebook pixel ID and/or the Google Analytics ID and Sublytics will match that ID to what you have connected.
If you have not yet added marketing connections, see more information on setting them up here.
Page Customization
Custom CSS:
- colors
- images
- fonts
- spacing around things
- hiding elements
- alignments
- borders
- animation
Caution: custom CSS fields will not allow:
- Rearranging form fields
- Special validation/functionalities around form fields
You are able to hide anything with CSS, but if it's a required field, the customer will not be able to move on with the checkout.
Example: User has the ability to: resize them, add color, align them certain ways, but cannot move the address field above the name.
Set your Campaign Terms & Conditions
Terms are fully customizable within Sublytics, so that you can always remain compliant within your industry. Navigate to Checkout Settings, then the Terms & Conditions section.
You can have Required or Non-Required, or a combination of both. If you have more lengthy terms you can also link to an external page.
Required Terms
Add copy here if you would like to require customers to actively check and acknowledge any terms. Add specific offers you would like this to show up for, or select all recurring offers or one time sales
Example: I need customers to check that they understand and are opting into a recurring charge for all subscription products. I will add the legal copy in the Required Terms box and select the drop-down under Require Terms Checkbox to select Recurring offers.
Non-Required Terms
Add copy here if you would like them stated but do not require action on the customer's part.
Example: You already have T&C's covered in your front end flow but want a reminder upon checkout.
Validation Tips
- Make sure you have T&C's set on campaigns, especially with recurring offers
- Confirm all merchants attached to your campaign are set to live
- Set overarching restrictions to limit sales based on country, or set expiration dates on refunds
- Make sure Shipping Profiles and country restrictions are set in your campaign
- Associate all tracking IDs and pixels where you need to share campaign specific tracking information.