In this article you will learn the steps to test through your billing setup.
Creating a test Merchant
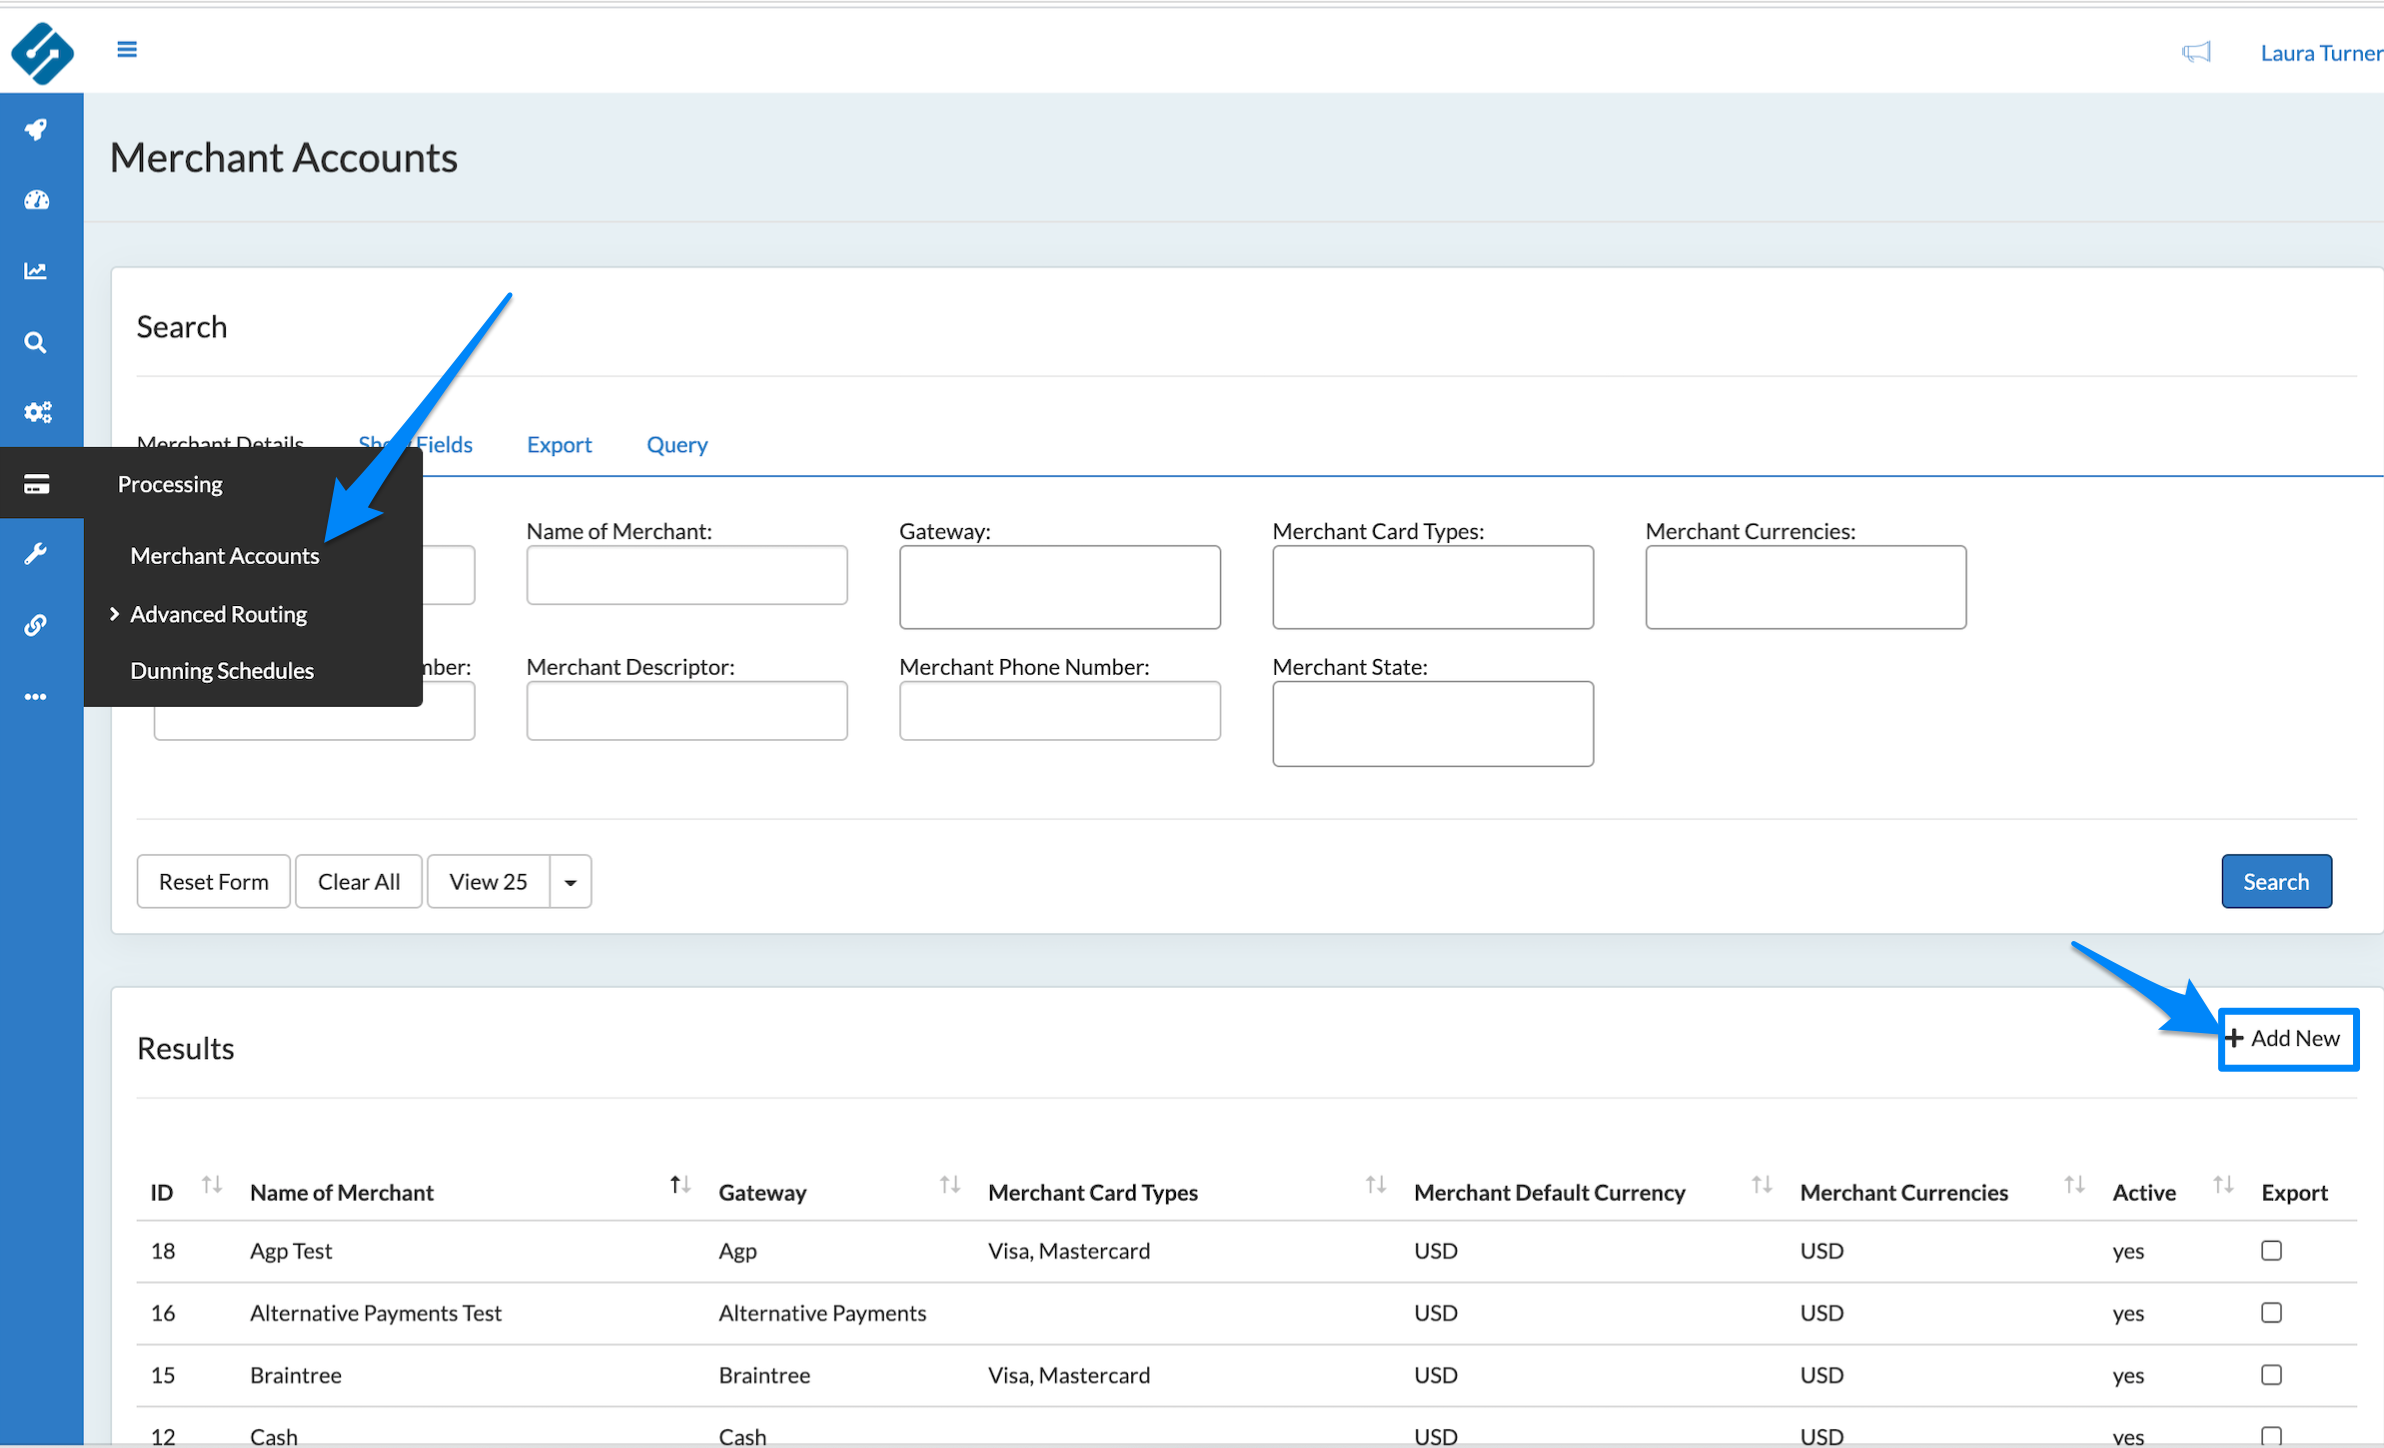
To add a Merchant
Processing → Merchant Account → +Add New
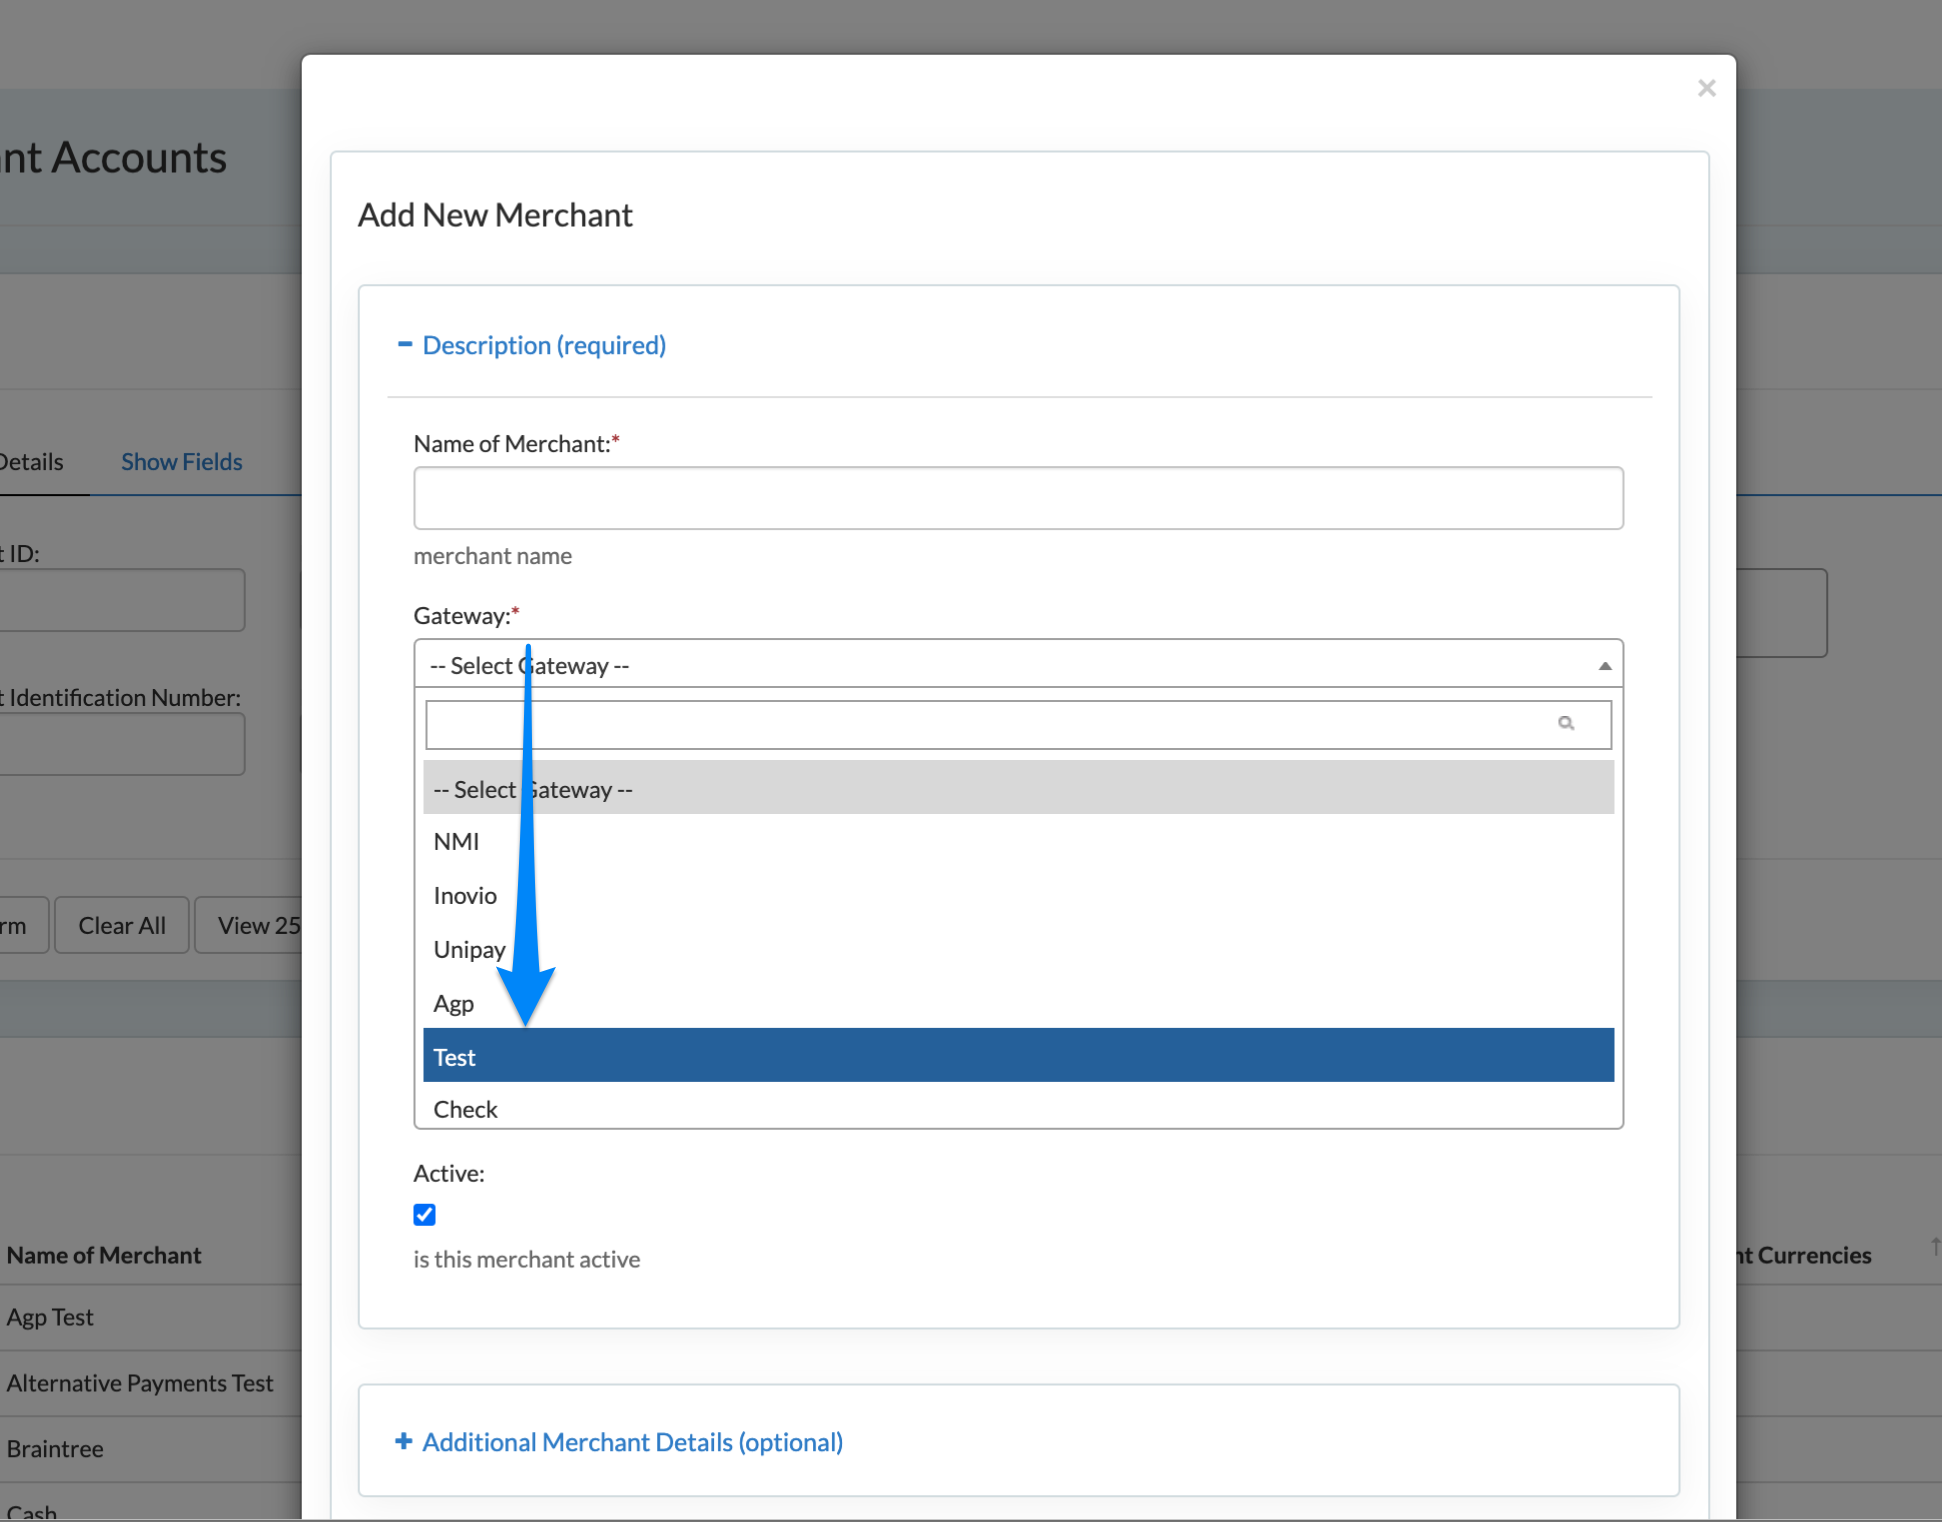
1. Add a Merchant Account:
2. Select Test for the Gateway:
Test Credit Card:
- Successful Transaction
- 4111222233334444
- Decline Transaction
- 4111222233335555
- Any CVV and any expiry
More information on Merchant Accounts here.
Creating a Test Payment Router
To add a Payment Router
Processing → Payment Routing → +Add New
Select all merchants to be tested. This can include PayPal testing as well.
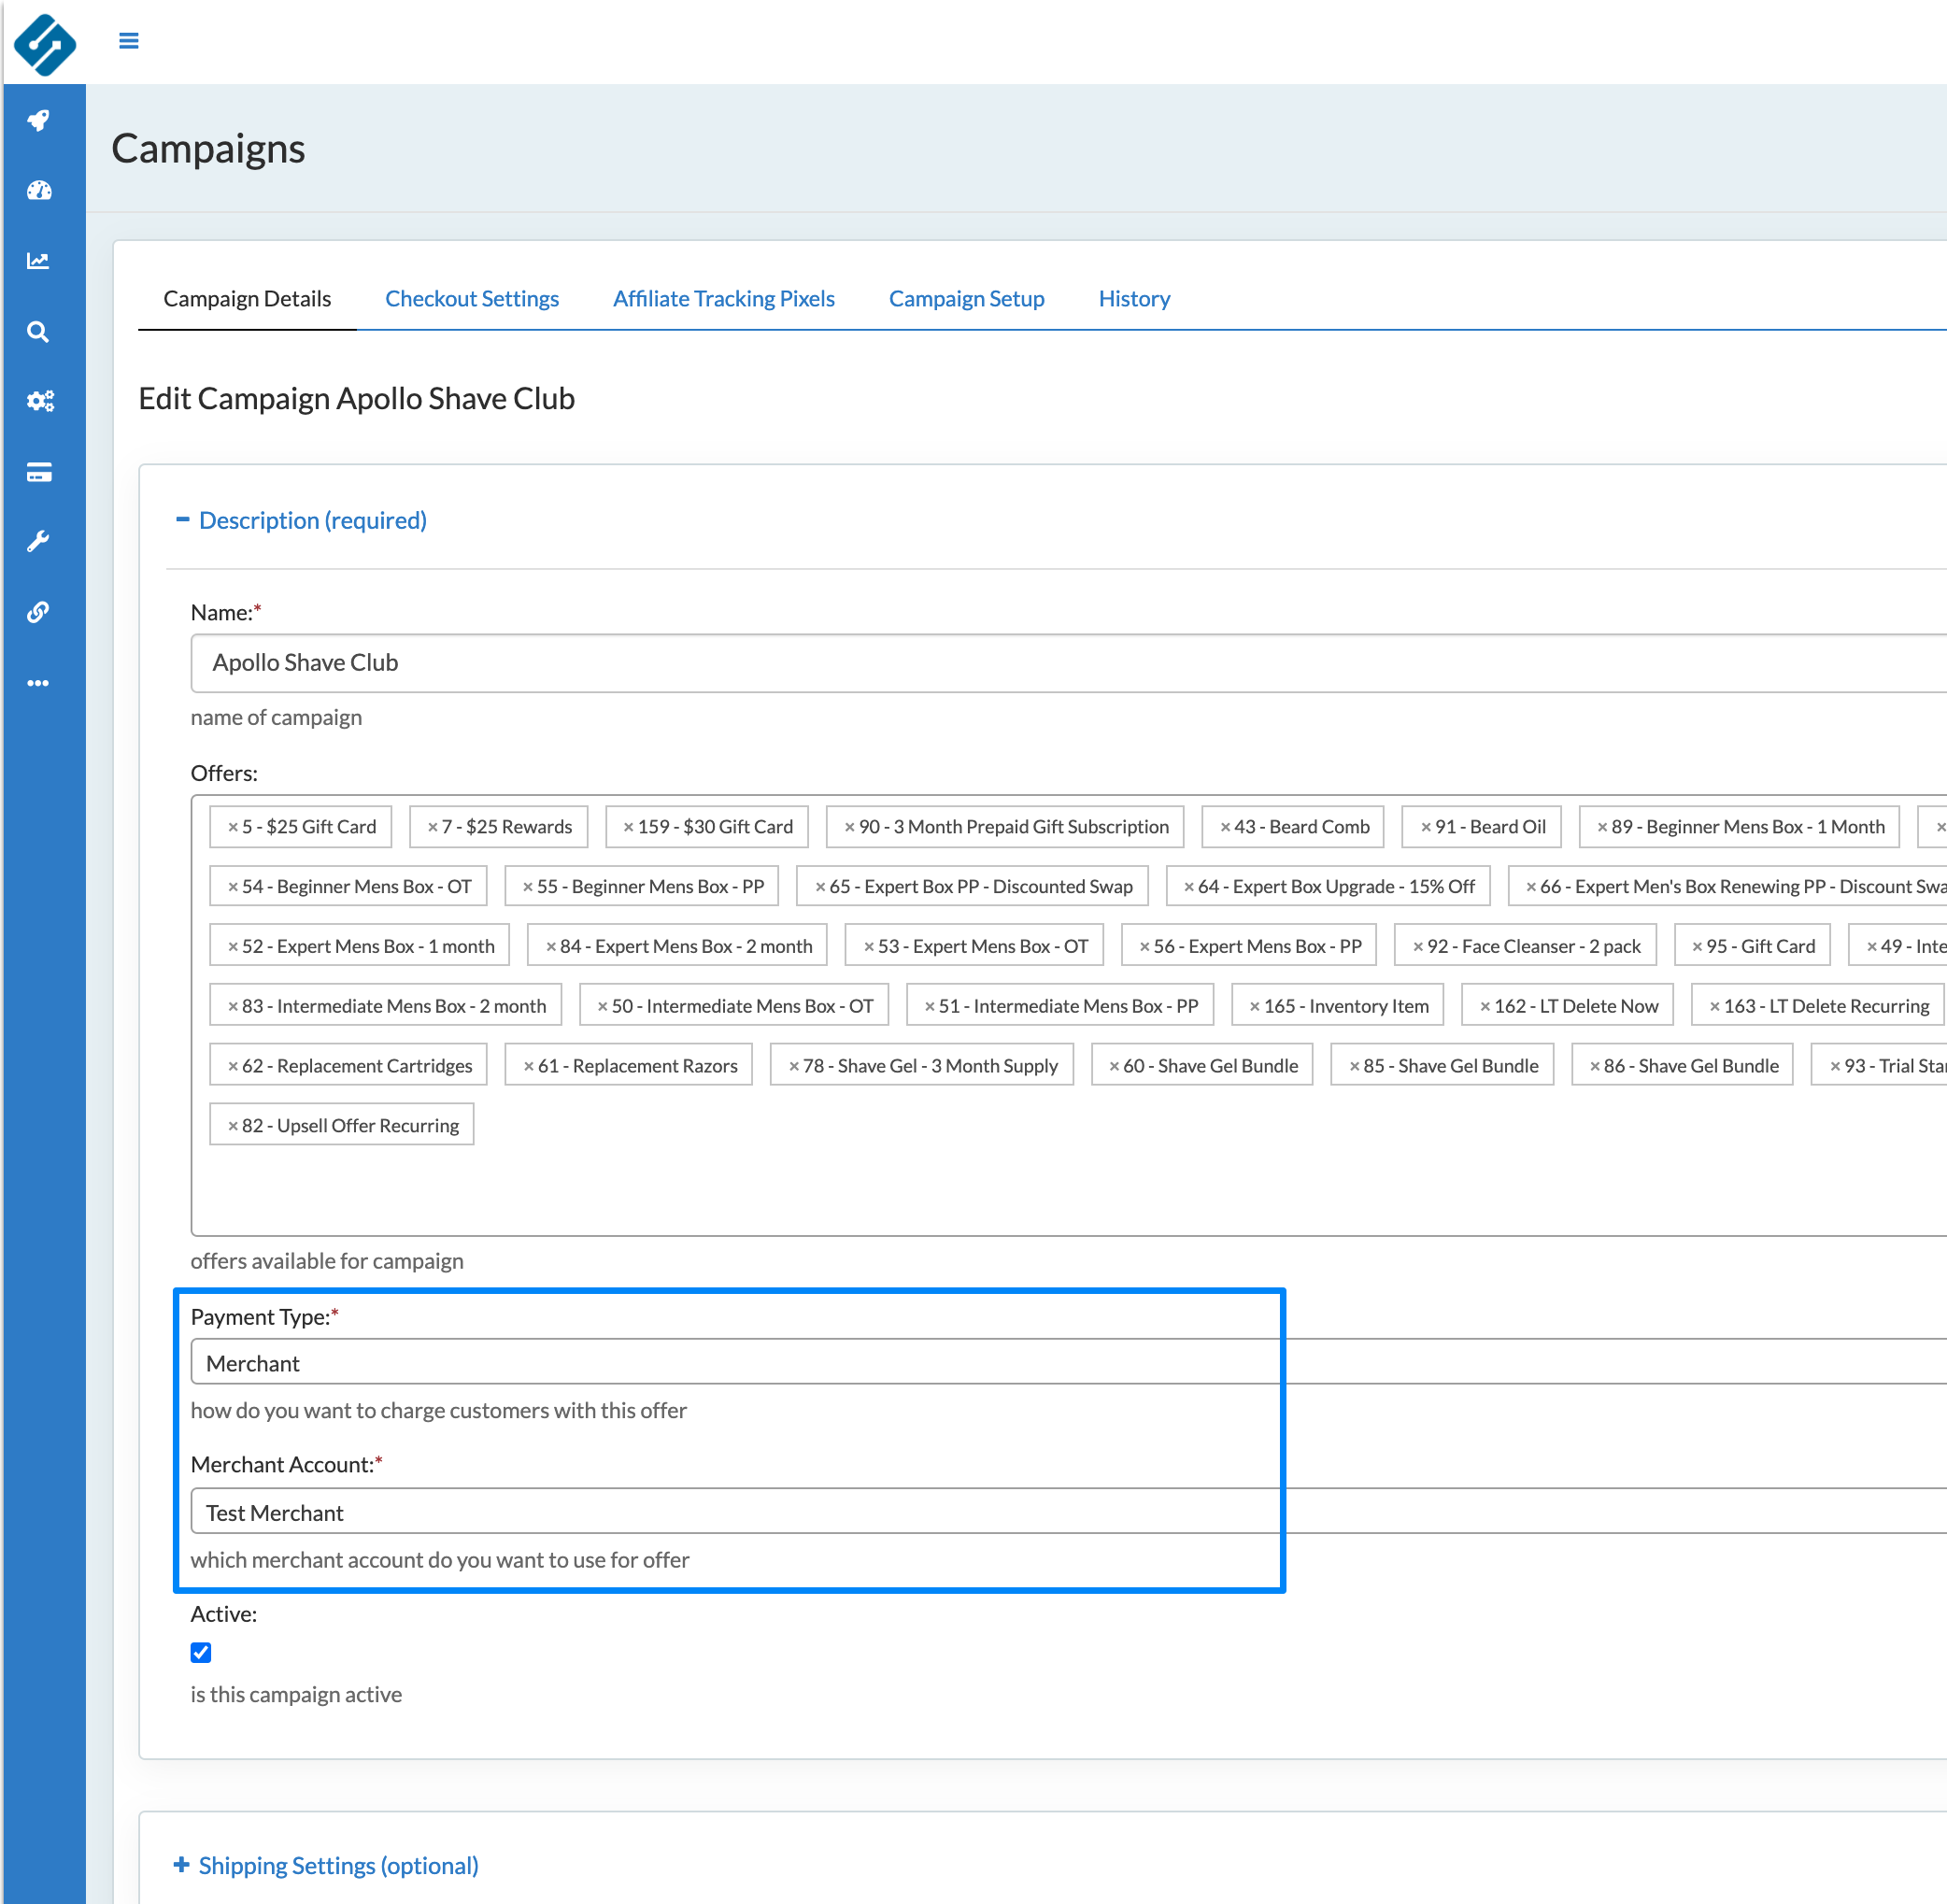
Adding Payment Options to a Campaign
The Payment setting lives within the campaign. Once you have your Test Merchant and Test Routers (if applicable) setup, select the campaign and update the following:
- Payment Type
- Merchant - Select a single Merchant to be used across campaign, for all transactions
- Router - Select the payment Router to be used across campaign. Transactions will defer to the router to determine which Merchant to use.
- Merchant / Router Select
- Assign the Merchant or Router to use